

These tenders use a dry coating, buttermilk, and a honey barbecue glaze. The oven cooks them quickly on a rack.
Measure the coating precisely. Keep the pieces separated. Weigh, watch, repeat.
Why You'll Love This Recipe
About the Ingredients
900g (2 lb) chicken tenderloins
Choose pieces with similar thickness for even cooking. Substitute sliced boneless chicken breast if needed.
120g (1 cup) all-purpose flour
All-purpose flour forms the dry shell. Use a certified gluten-free 1:1 flour blend for a gluten-free version.
32g (1/4 cup) cornstarch
Cornstarch reduces heaviness and improves crispness. Buy potato starch as a direct substitute.
6g (2 tsp) smoked paprika
Smoked paprika adds a restrained smoky note. Use sweet paprika when buying a milder spice.
4g (1 1/2 tsp) garlic powder
Garlic powder spreads flavor evenly through the coating. Substitute onion powder for a softer flavor.
7g (1 1/4 tsp) fine salt
Fine salt distributes quickly in the flour. Use kosher salt, but weigh it because crystal sizes vary.
2g (1 tsp) ground black pepper
Freshly ground pepper gives sharper flavor. Use pre-ground pepper when convenience matters.
50g (1 large) beaten egg
Egg helps the coating adhere to each tender. Replace it with 45g aquafaba for an egg-free coating.
120g (1/2 cup) buttermilk
Buttermilk adds tang and loosens the egg mixture. Substitute plain yogurt thinned with 30g water.
20g (1 tbsp plus 1 tsp) neutral oil
Neutral oil prevents sticking on the rack. Use avocado oil for higher-heat cooking.
180g (3/4 cup) barbecue sauce
Use a thick, balanced sauce so it clings well. Choose a low-sugar sauce if you prefer less sweetness.
85g (1/4 cup) honey
Honey creates gloss and caramelized edges. Substitute maple syrup, using the same weight.
Tips & Tricks
- Dry chicken thoroughly before coating it. Moisture creates bare patches and softens the crust.
- Leave space between tenders on the rack. Crowding traps steam and prevents browning.
- Glaze only after the chicken cooks. Early honey can darken before the meat reaches temperature.
- Check the thickest tender with a thermometer. Remove it only at 165°F (74°C).
Pro Tips
Step-by-Step Instructions
1. Preheat the Oven
Preheat the oven to 425°F (220°C) for 10 minutes. [A fully heated oven sets the coating quickly.] The oven indicator should read 425°F (220°C) before cooking.
2. Mix the Glaze
Whisk 180g barbecue sauce with 85g honey until uniform. [Even mixing prevents sweet streaks from burning.] The glaze is glossy and streak-free when ready.
3. Dry the Chicken
Pat 900g chicken tenderloins dry with paper towels. [Dry surfaces hold the coating more effectively.] The chicken feels tack-free when finished.
4. Combine Dry Coating
Stir flour, cornstarch, paprika, garlic powder, salt, and pepper in a shallow bowl. [Uniform seasoning prevents bland patches.] The mixture should have one consistent color.
5. Whisk Wet Mixture
Whisk the egg and buttermilk in a second shallow bowl. [The mixture creates adhesion without a heavy batter.] The liquid should look smooth with no egg streaks.
6. Coat the Tenders
Dip each tender in the wet mixture, then press it into the dry coating. [Pressure helps the flour form a stable crust.] Each piece should show no bare wet patches.
7. Load the Rack
Place an oiled wire rack over a lined baking sheet and arrange the tenders with space between them. [Airflow keeps the underside crisp.] The rack should look shiny, with no touching pieces.
8. Bake First Side
Bake at 425°F (220°C) for 10 minutes. [The first bake sets the coating before turning.] The surface should look dry and lightly golden.
9. Turn and Bake
Turn each tender and bake at 425°F (220°C) for 8 minutes. [Turning browns both sides evenly.] The thickest tender should reach 165°F (74°C) with golden-brown edges.
10. Glaze and Finish
Brush the tenders with the honey barbecue glaze and bake at 425°F (220°C) for 2 minutes. [Brief heat sets the glaze without scorching the honey.] Bubbling edges and a sticky surface signal completion.
Delicious Variations
Spicy honey tenders
Add 3g cayenne pepper to the dry coating.
Ranch barbecue tenders
Add 8g ranch seasoning to the flour mixture.
Maple chipotle tenders
Replace honey with maple syrup and add 5g chipotle sauce.
How to Store Honey BBQ Chicken Tenders
Refrigerator
Refrigerate cooled tenders in an airtight container for up to 3 days.
Freezer
Freeze cooled tenders in a single layer, then transfer them to a freezer bag for up to 2 months.
Reheating
Reheat refrigerated tenders at 400°F (205°C) for 8 minutes. Reheat frozen tenders at 400°F (205°C) for 14 minutes.
Frequently Asked Questions
Q: How do you keep baked chicken tenders crispy?
Use a wire rack and leave space between every tender. The rack allows hot air to circulate underneath, preventing steam buildup.
Q: Can I make honey BBQ chicken tenders with chicken breast?
Yes, slice boneless chicken breast into strips of similar thickness. Check the thickest strip at 165°F (74°C), because larger pieces need more time.
Q: How long do honey BBQ chicken tenders last in the refrigerator?
They last up to 3 days when refrigerated in an airtight container. Reheat them in the oven to restore the coating.
Q: Can I air fry honey BBQ chicken tenders?
Yes, air fry unglazed tenders at 400°F (205°C) for 10 minutes, turning halfway. Brush on glaze and cook for 2 additional minutes.
Q: How do I know chicken tenders are done?
They are done when the thickest piece reaches 165°F (74°C). The coating should be golden brown, and the juices should run clear.
Make these honey BBQ chicken tenders tonight, then serve them with slaw or roasted potatoes. Weigh, watch, repeat.
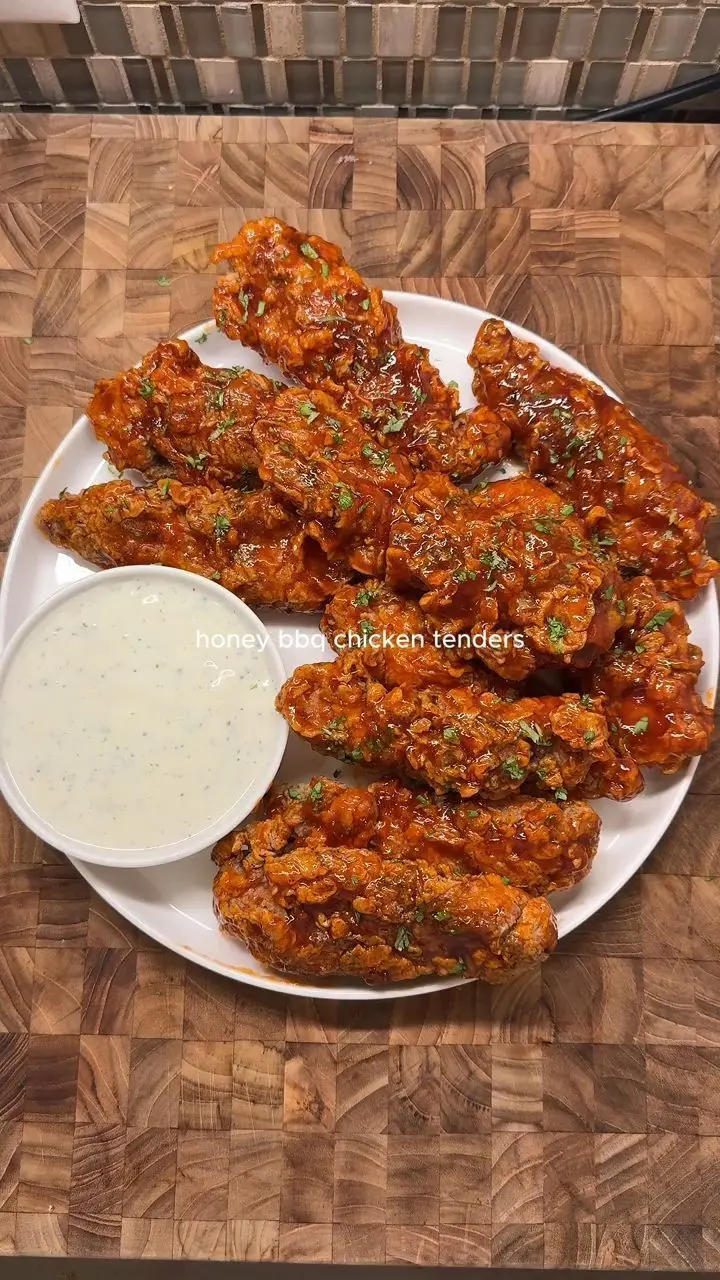
Honey BBQ Chicken Tenders
Honey BBQ chicken tenders deliver crisp oven-baked coating, sticky glaze, and 20-minute cooking for a family dinner with less cleanup tonight.
🧂 Ingredients
- 900g (2 lb) chicken tenderloins
- 120g (1 cup) all-purpose flour
- 32g (1/4 cup) cornstarch
- 6g (2 tsp) smoked paprika
- 4g (1 1/2 tsp) garlic powder
- 7g (1 1/4 tsp) fine salt
- 2g (1 tsp) ground black pepper
- 50g (1 large) beaten egg
- 120g (1/2 cup) buttermilk
- 20g (1 tbsp plus 1 tsp) neutral oil
- 180g (3/4 cup) barbecue sauce
- 85g (1/4 cup) honey
📋 Instructions
- 1Preheat the Oven — Preheat the oven to 425°F (220°C) for 10 minutes. [A fully heated oven sets the coating quickly.] The oven indicator should read 425°F (220°C) before cooking.
- 2Mix the Glaze — Whisk 180g barbecue sauce with 85g honey until uniform. [Even mixing prevents sweet streaks from burning.] The glaze is glossy and streak-free when ready.
- 3Dry the Chicken — Pat 900g chicken tenderloins dry with paper towels. [Dry surfaces hold the coating more effectively.] The chicken feels tack-free when finished.
- 4Combine Dry Coating — Stir flour, cornstarch, paprika, garlic powder, salt, and pepper in a shallow bowl. [Uniform seasoning prevents bland patches.] The mixture should have one consistent color.
- 5Whisk Wet Mixture — Whisk the egg and buttermilk in a second shallow bowl. [The mixture creates adhesion without a heavy batter.] The liquid should look smooth with no egg streaks.
- 6Coat the Tenders — Dip each tender in the wet mixture, then press it into the dry coating. [Pressure helps the flour form a stable crust.] Each piece should show no bare wet patches.
- 7Load the Rack — Place an oiled wire rack over a lined baking sheet and arrange the tenders with space between them. [Airflow keeps the underside crisp.] The rack should look shiny, with no touching pieces.
- 8Bake First Side — Bake at 425°F (220°C) for 10 minutes. [The first bake sets the coating before turning.] The surface should look dry and lightly golden.
- 9Turn and Bake — Turn each tender and bake at 425°F (220°C) for 8 minutes. [Turning browns both sides evenly.] The thickest tender should reach 165°F (74°C) with golden-brown edges.
- 10Glaze and Finish — Brush the tenders with the honey barbecue glaze and bake at 425°F (220°C) for 2 minutes. [Brief heat sets the glaze without scorching the honey.] Bubbling edges and a sticky surface signal completion.

Tomasz writes precise, method-first recipes for breads, ferments, and slow braises, drawing on Polish and Central European home cooking. He cares about weights, temperatures, and timing, and explains the reason behind each step so cooks can repeat results. His angle is turning fussy techniques into clear, checkable instructions.