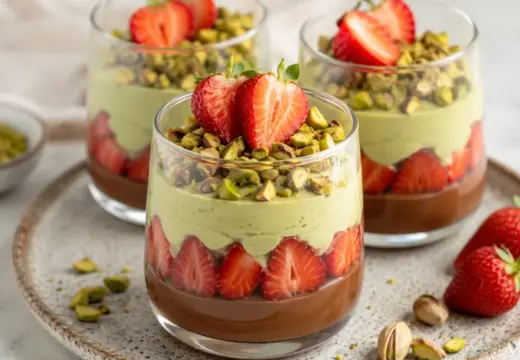
Biscoff Cheesecake Cups take everything you love about cheesecake and pack it into a single, spoonable glass. A buttery Biscoff cookie crust gets pressed into the bottom, then topped with a cloud of no-bake cheesecake filling swirled with cookie butter.
The best part is that these cups need zero oven time for the filling, so they are perfect for warm weather, potlucks, and last-minute dinner guests. You can make them ahead and pull them straight from the fridge when dessert o'clock hits.
Each cup delivers that signature caramelized spice flavor of Biscoff in three textures: crunchy, creamy, and silky. They look impressive enough for a dinner party but come together with just a bowl and a hand mixer.
Why You'll Love This Recipe
About the Ingredients
1 1/2 cups (150g) Biscoff cookie crumbs (about 20 cookies)
Crush whole Lotus Biscoff cookies in a food processor or with a rolling pin. If you cannot find Biscoff, gingersnaps or speculoos cookies work as a close substitute.
5 tablespoons (70g) unsalted butter, melted
Melt butter in the microwave in 20-second bursts until fully liquid. Salted butter works too; just skip the pinch of salt in the crust.
1 tablespoon (12g) granulated sugar
A little sugar helps the crust hold together and balances the spice of the cookies. You can omit it if your cookies are extra sweet.
8 ounces (225g) full-fat cream cheese, softened
Full-fat block cream cheese gives the creamiest result; avoid whipped or tub-style spread. Let it sit at room temperature for 30 minutes so it blends smooth.
1/2 cup (120g) Biscoff cookie butter spread
Use smooth Biscoff spread for a silky swirl; crunchy works if you want extra texture. Warm it for 10 seconds if it is stiff from the fridge.
1/3 cup (65g) granulated sugar
Superfine sugar dissolves fastest, but regular granulated is fine. Taste your cookie butter first and reduce sugar slightly if it is very sweet.
1 teaspoon vanilla extract
Pure vanilla rounds out the spice flavor; imitation vanilla is an acceptable budget swap. Add an extra 1/4 teaspoon if you love a stronger vanilla note.
3/4 cup (180ml) cold heavy whipping cream
Keep it cold straight from the fridge so it whips quickly to stiff peaks. Do not substitute milk or half-and-half, as it will not hold the same volume.
1/4 cup (60g) sour cream, room temperature
Sour cream adds tang and lightens the filling; full-fat Greek yogurt is a great substitute. Bring it to room temperature so it does not seize the mixture.
Whipped cream and crushed Biscoff cookies, for topping
A swirl of whipped cream and a few cookie shards make these look bakery-made. Toasted crushed nuts or a caramel drizzle are tasty alternatives.
Tips & Tricks
Soften Cream Cheese Fully
Cold cream cheese will leave lumps no matter how long you beat it, so let it sit out for at least 30 minutes.
Whip the Cream Separately
Fold in whipped cream at the end instead of beating it with the cream cheese, or the filling turns dense and greasy.
Chill Before Serving
Give the cups at least 3 hours in the fridge so the crust firms up and the filling sets to a scoopable texture.
Layer in Clear Glasses
Use small clear cups or jars so the crust, filling, and topping layers are visible and photo-worthy.
Pro Tips
Step-by-Step Instructions
1. Make the Crust
Pulse the Biscoff cookies into fine crumbs, then stir in the melted butter and 1 tablespoon of sugar until the mixture looks like wet sand. Divide it evenly among 6 small glasses or jars and press firmly into the bottom with the back of a spoon.
2. Chill the Base
Place the glasses in the refrigerator for 15 minutes while you make the filling so the crust sets and stays crisp under the creamy layer.
3. Beat the Cream Cheese
In a large bowl, beat the softened cream cheese, 1/3 cup sugar, and vanilla with a hand mixer on medium speed for 2 minutes until completely smooth and no lumps remain. Scrape down the bowl halfway through.
4. Add Cookie Butter and Sour Cream
Beat in the Biscoff spread and sour cream on low speed until fully incorporated, about 30 seconds. The mixture should look glossy and uniform, with no streaks of cookie butter.
5. Whip the Cream
In a separate chilled bowl, whip the cold heavy cream on medium-high speed for 1 to 2 minutes until stiff peaks form. The cream is ready when the beaters leave a sharp peak that holds without flopping over.
6. Fold It Together
Gently fold the whipped cream into the cream cheese mixture in three additions with a spatula, using a light hand to keep the filling airy and mousse-like.
7. Layer the Cups
Spoon or pipe the filling over the chilled crusts, filling each glass about three-quarters full. Tap the glasses gently on the counter to release any air pockets.
8. Chill and Top
Refrigerate for at least 3 hours, or overnight, until the filling is fully set. Before serving, top each cup with whipped cream, crushed Biscoff cookies, and a drizzle of warmed cookie butter.
Delicious Variations
Chocolate Biscoff Cups
Add 2 tablespoons of cocoa powder to the filling and use chocolate cookie crumbs for the base.
Salted Caramel Biscoff Cups
Swirl 2 tablespoons of salted caramel sauce into the filling and finish with flaky sea salt.
Banana Biscoff Cups
Layer thin banana slices between the crust and filling for a banana-and-cookie-butter twist.
How to Store Biscoff Cheesecake Cups
Refrigerator
Store covered in the refrigerator for up to 3 days; the crust softens slightly after 48 hours but stays delicious.
Freezer
Freeze the cups without the topping for up to 1 month in airtight containers; thaw in the refrigerator for 4 hours before serving.
Reheating
No reheating needed; serve these cups cold straight from the refrigerator for the best texture.
Frequently Asked Questions
Q: Can I make Biscoff cheesecake cups ahead of time?
Yes, these cups are ideal for making 1 to 2 days ahead and actually improve as they chill. Keep them covered in the refrigerator and add the whipped cream and cookie topping just before serving so they stay crisp.
Q: Can I use Cool Whip instead of heavy cream?
Yes, you can substitute 1 1/2 cups of thawed whipped topping for the heavy cream if you want a shortcut. Fold it into the cream cheese mixture gently and note that the filling will be slightly softer and sweeter.
Q: Why is my cheesecake filling lumpy?
Lumpy filling almost always means your cream cheese was too cold when you started beating it. Let the cream cheese sit at room temperature for at least 30 minutes and beat it alone until smooth before adding anything else.
Q: How long do Biscoff cheesecake cups last in the fridge?
They stay fresh for up to 3 days stored covered in the refrigerator. For the best texture, enjoy them within 48 hours, since the cookie crust gradually softens over time.
Q: Can I make this as one large cheesecake instead of cups?
Yes, press the crust into a 9-inch springform pan and chill it for 20 minutes before adding the filling. Refrigerate the whole cheesecake for at least 6 hours or overnight before slicing.
If you make these Biscoff Cheesecake Cups, snap a photo and let me know how they turned out in the comments. They are the easiest way to bring a little bakery magic to your table, so grab those cookies and get layering!

Biscoff Cheesecake Cups
Biscoff Cheesecake Cups are creamy no-bake desserts layered with buttery cookie crust and silky Biscoff cheesecake filling.
🧂 Ingredients
- 1 1/2 cups (150g) Biscoff cookie crumbs (about 20 cookies)
- 5 tablespoons (70g) unsalted butter, melted
- 1 tablespoon (12g) granulated sugar
- 8 ounces (225g) full-fat cream cheese, softened
- 1/2 cup (120g) Biscoff cookie butter spread
- 1/3 cup (65g) granulated sugar
- 1 teaspoon vanilla extract
- 3/4 cup (180ml) cold heavy whipping cream
- 1/4 cup (60g) sour cream, room temperature
- Whipped cream and crushed Biscoff cookies, for topping
📋 Instructions
- 1Make the Crust — Pulse the Biscoff cookies into fine crumbs, then stir in the melted butter and 1 tablespoon of sugar until the mixture looks like wet sand. Divide it evenly among 6 small glasses or jars and press firmly into the bottom with the back of a spoon.
- 2Chill the Base — Place the glasses in the refrigerator for 15 minutes while you make the filling so the crust sets and stays crisp under the creamy layer.
- 3Beat the Cream Cheese — In a large bowl, beat the softened cream cheese, 1/3 cup sugar, and vanilla with a hand mixer on medium speed for 2 minutes until completely smooth and no lumps remain. Scrape down the bowl halfway through.
- 4Add Cookie Butter and Sour Cream — Beat in the Biscoff spread and sour cream on low speed until fully incorporated, about 30 seconds. The mixture should look glossy and uniform, with no streaks of cookie butter.
- 5Whip the Cream — In a separate chilled bowl, whip the cold heavy cream on medium-high speed for 1 to 2 minutes until stiff peaks form. The cream is ready when the beaters leave a sharp peak that holds without flopping over.
- 6Fold It Together — Gently fold the whipped cream into the cream cheese mixture in three additions with a spatula, using a light hand to keep the filling airy and mousse-like.
- 7Layer the Cups — Spoon or pipe the filling over the chilled crusts, filling each glass about three-quarters full. Tap the glasses gently on the counter to release any air pockets.
- 8Chill and Top — Refrigerate for at least 3 hours, or overnight, until the filling is fully set. Before serving, top each cup with whipped cream, crushed Biscoff cookies, and a drizzle of warmed cookie butter.