
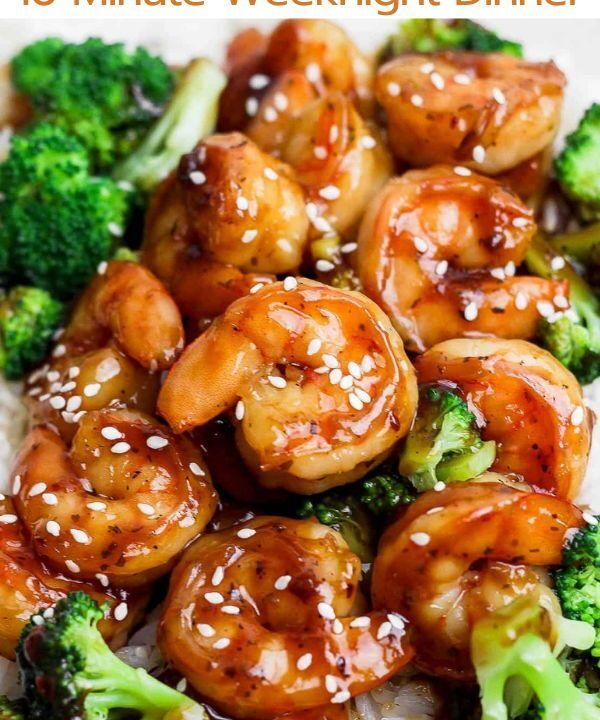
This quick and easy teriyaki shrimp earns a permanent spot in your weekly rotation because it goes from frozen bag to glossy, takeout-style dinner faster than delivery can ring your doorbell.
The sauce is the whole trick here, and it is just four pantry staples whisked in a measuring cup: soy sauce, brown sugar, rice vinegar, and a little cornstarch to make it cling. You simmer it for two minutes until it thickens to the texture of warm honey, then toss in shrimp that have seared for barely three minutes. That is the entire dish.
I keep a bag of frozen shrimp in the freezer for exactly this reason. Thaw them under cool running water for ten minutes while you mix the sauce and start the rice, and dinner is on the table before anyone finishes setting it.
Why You'll Love This Recipe
About the Ingredients
1 1/2 pounds (680g) large raw shrimp, peeled and deveined, tails on or off
Frozen shrimp work beautifully here; thaw them in a bowl of cool water for 10 minutes and pat very dry. If shrimp is out of budget, bite-size chicken thigh pieces work with 3 extra minutes of cooking.
1/3 cup (80ml) low-sodium soy sauce
Low-sodium keeps the sauce from turning salty after it reduces. Tamari is a seamless gluten-free swap, and coconut aminos work if you cut the brown sugar to 2 tablespoons.
3 tablespoons packed brown sugar
Light or dark both work; dark gives a deeper molasses note. Honey can replace it measure for measure, though the sauce will brown a touch faster.
2 tablespoons rice vinegar
This is the brightness that keeps the sauce from tasting flat. Unseasoned rice vinegar is ideal; apple cider vinegar is a fine stand-in, but use 1 tablespoon less.
1 tablespoon cornstarch whisked into 1/4 cup (60ml) cold water
The cold water keeps the cornstarch from clumping. Arrowroot powder or potato starch thickens the same way, so use whichever you have.
1 tablespoon toasted sesame oil
Toasted, not plain, is what gives that nutty restaurant aroma. If you only have plain sesame oil, add a teaspoon of tahini or skip it and finish with sesame seeds.
1 tablespoon neutral oil, such as canola or avocado
This is for the sear, so pick something with a high smoke point. Olive oil works in a pinch but will smoke at high heat.
3 cloves garlic, finely grated
Fresh garlic is best; the jarred kind tastes slightly metallic once cooked. A teaspoon of garlic paste is an easy shortcut.
1 teaspoon freshly grated ginger
Grate it on a microplane so it melts into the sauce. Ground ginger works at 1/4 teaspoon if fresh is not on hand.
3 cups cooked jasmine rice, for serving
Jasmine or short-grain rice soaks up the sauce best. Cauliflower rice or rice noodles are good lower-carb swaps.
2 scallions, thinly sliced, plus 1 teaspoon sesame seeds for garnish
Slice on the bias for that restaurant look. Thin red onion or chives work if scallions are missing.
Tips & Tricks
Dry the shrimp completely
Any water left on the shrimp steams instead of sears, so pat them with paper towels until they feel tacky, not slippery.
Do not walk away from the sauce
Cornstarch-thickened sauce goes from glossy to gummy in about 30 seconds, so stir constantly once it starts bubbling.
Season the shrimp before it hits the pan
A light pinch of salt and pepper on the raw shrimp seasons the meat itself, not just the outside.
Cook in batches if your pan is crowded
Shrimp need breathing room to brown; if they overlap, they will release water and turn rubbery.
Pro Tips
Step-by-Step Instructions
1. Mix the Teriyaki Sauce
Whisk the soy sauce, brown sugar, rice vinegar, grated garlic, and grated ginger in a small bowl, then stir in the cornstarch slurry. Set it near the stove so it is ready the second the shrimp come out.
2. Dry and Season the Shrimp
Pat the shrimp very dry with paper towels and season lightly with salt and pepper. Dry shrimp are the difference between a golden sear and a puddle of steam.
3. Heat the Skillet
Set a large skillet over medium-high heat (about 400°F / 205°C) for 2 minutes, then add the neutral oil and swirl. The oil should shimmer and slide easily, and a drop of water should sizzle on contact.
4. Sear the Shrimp
Add the shrimp in a single layer and cook for 90 seconds per side, about 3 minutes total, until they are pink and opaque with golden edges and curl into a loose C. Work in two batches if the pan looks crowded, then transfer them to a plate.
5. Simmer the Sauce
Lower the heat to medium (about 300°F / 150°C) and pour in the sauce. Stir constantly for 2 to 3 minutes until it bubbles at the edges and coats the back of a spoon like warm honey.
6. Toss and Gloss
Return the shrimp to the pan off the heat, add the sesame oil, and toss for 30 seconds until every shrimp is glossy and coated. The sauce should cling, not pool.
7. Serve
Spoon over warm jasmine rice and scatter with scallions and sesame seeds. Serve right away, while the glaze is still sticky and shiny.
Delicious Variations
Teriyaki Shrimp Stir-Fry
Add a cup of broccoli florets and half a sliced red bell pepper to the hot pan before the shrimp and cook 3 minutes, then proceed as written.
Spicy Teriyaki Shrimp
Stir a teaspoon of sriracha or chili crisp into the finished sauce for a sweet-heat version that is excellent over noodles.
Teriyaki Shrimp Skewers
Thread shrimp onto soaked skewers, brush with sauce, and broil 3 minutes per side about 6 inches from the element for a cookout-friendly take.
How to Store Quick & Easy Teriyaki Shrimp Recipe
Refrigerator
Store leftovers in an airtight container in the refrigerator for up to 2 days; keep the rice separate so it does not turn soggy.
Freezer
Freeze the cooked shrimp and sauce alone, without rice, in a freezer bag for up to 1 month; thaw overnight in the refrigerator.
Reheating
Reheat gently in a covered skillet over low heat (about 250°F / 120°C) with a splash of water for 2 to 3 minutes, just until warm, since high heat toughens shrimp.
Frequently Asked Questions
Q: How do I know when shrimp are fully cooked?
Shrimp are done when they turn opaque white and pink and curl into a loose C shape, which takes about 3 minutes in a hot pan. A tight O curl means they are overcooked and will be rubbery. If you want to be certain, the internal temperature should read 145°F (63°C).
Q: Can I use frozen shrimp for this teriyaki shrimp recipe?
Yes, frozen shrimp work perfectly as long as you thaw and dry them first. Run them under cool water for about 10 minutes, then pat them thoroughly dry so they sear instead of steam. Avoid thawing in hot water, which starts cooking them unevenly.
Q: Why did my teriyaki sauce get too thick or gluey?
The sauce turns gluey when it simmers too long after the cornstarch goes in, so pull it off the heat as soon as it coats a spoon. If it has already thickened too much, whisk in a tablespoon of water at a time until it loosens. Adding the shrimp off the heat also stops the sauce from over-reducing.
Q: Can I make this teriyaki shrimp ahead of time?
You can make the sauce up to 5 days ahead and keep it in a jar in the refrigerator, then cook the shrimp fresh the night you serve it. Cooked shrimp are best eaten within a day because they toughen as they sit. Reheat gently over low heat with a splash of water.
Q: Is this teriyaki shrimp gluten-free?
It is gluten-free if you swap the soy sauce for tamari or a gluten-free soy sauce, since regular soy sauce contains wheat. Check that your rice vinegar and any bottled additions are also gluten-free. The rest of the ingredients are naturally gluten-free.
If you make this quick and easy teriyaki shrimp, I would love to hear how it turned out, especially if you tried the spicy version or served it over noodles instead of rice. Cook it your way, and tell me how it went.
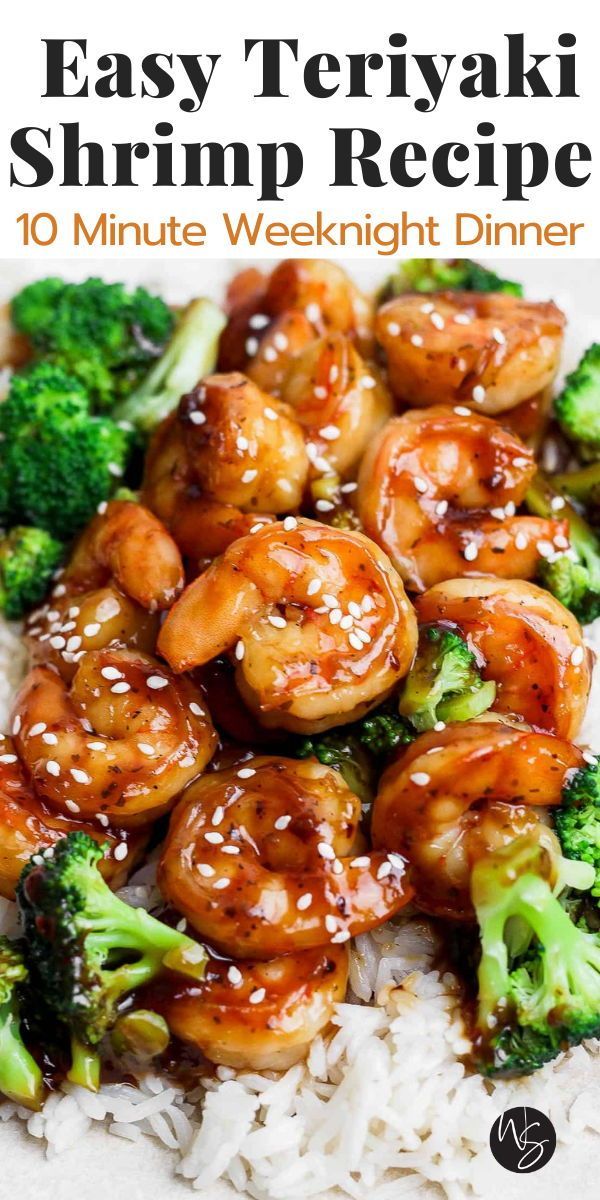
Quick & Easy Teriyaki Shrimp Recipe
This Quick & Easy Teriyaki Shrimp recipe gives you glossy, sweet-savory shrimp in 25 minutes with a homemade sauce that beats any bottle.
🧂 Ingredients
- 1 1/2 pounds (680g) large raw shrimp, peeled and deveined, tails on or off
- 1/3 cup (80ml) low-sodium soy sauce
- 3 tablespoons packed brown sugar
- 2 tablespoons rice vinegar
- 1 tablespoon cornstarch whisked into 1/4 cup (60ml) cold water
- 1 tablespoon toasted sesame oil
- 1 tablespoon neutral oil, such as canola or avocado
- 3 cloves garlic, finely grated
- 1 teaspoon freshly grated ginger
- 3 cups cooked jasmine rice, for serving
- 2 scallions, thinly sliced, plus 1 teaspoon sesame seeds for garnish
📋 Instructions
- 1Mix the Teriyaki Sauce — Whisk the soy sauce, brown sugar, rice vinegar, grated garlic, and grated ginger in a small bowl, then stir in the cornstarch slurry. Set it near the stove so it is ready the second the shrimp come out.
- 2Dry and Season the Shrimp — Pat the shrimp very dry with paper towels and season lightly with salt and pepper. Dry shrimp are the difference between a golden sear and a puddle of steam.
- 3Heat the Skillet — Set a large skillet over medium-high heat (about 400°F / 205°C) for 2 minutes, then add the neutral oil and swirl. The oil should shimmer and slide easily, and a drop of water should sizzle on contact.
- 4Sear the Shrimp — Add the shrimp in a single layer and cook for 90 seconds per side, about 3 minutes total, until they are pink and opaque with golden edges and curl into a loose C. Work in two batches if the pan looks crowded, then transfer them to a plate.
- 5Simmer the Sauce — Lower the heat to medium (about 300°F / 150°C) and pour in the sauce. Stir constantly for 2 to 3 minutes until it bubbles at the edges and coats the back of a spoon like warm honey.
- 6Toss and Gloss — Return the shrimp to the pan off the heat, add the sesame oil, and toss for 30 seconds until every shrimp is glossy and coated. The sauce should cling, not pool.
- 7Serve — Spoon over warm jasmine rice and scatter with scallions and sesame seeds. Serve right away, while the glaze is still sticky and shiny.

Mireille writes about weeknight cooking built around what is already in the pantry, with a focus on Haitian and Caribbean home dishes made simpler for busy kitchens. She favors short ingredient lists, honest substitutions, and recipes that forgive a missed step. Her angle is feeding a household well without a second trip to the store.