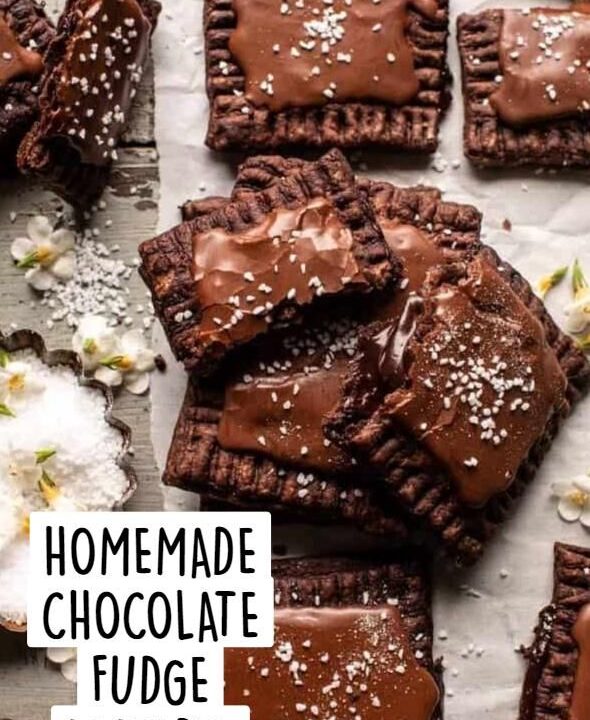
Remember tearing open that silver foil packet as a kid and biting into a warm, chocolate-filled rectangle? This homemade version takes that nostalgia and upgrades every single layer. Buttery, flaky pie-style dough wraps around a thick, glossy chocolate fudge filling that stays soft and molten even after the pastry cools.
The magic here is the fudge. Instead of a thin smear of chocolate spread, we cook a quick stovetop fudge with semisweet chocolate, sweetened condensed milk, and butter, then chill it until sliceable. That means every bite has a distinct, gooey fudge layer that contrasts beautifully with the crisp, golden crust.
These come together in about 50 minutes of hands-on and oven time, and they freeze like a dream. Make a double batch, seal them up, and you will never reach for the boxed version again. A simple vanilla glaze and a shower of flaky salt push them straight into dessert territory.
Why You'll Love This Recipe
About the Ingredients
2 1/2 cups (313g) all-purpose flour, plus more for dusting
All-purpose flour gives the right balance of tenderness and structure. For a slightly more tender crust, swap 1/2 cup of it for cake flour, or use a 1:1 gluten-free baking blend if needed.
1 cup (227g) cold unsalted butter, cubed
Cold butter is what creates those flaky layers, so keep it in the fridge until the last second. If you only have salted butter, cut the added salt in this recipe to 1/4 teaspoon.
1/2 teaspoon fine sea salt
Fine sea salt dissolves evenly into the dough. Kosher salt works too, but use a slightly heaped 1/2 teaspoon since the crystals are larger.
1/2 cup (120ml) ice-cold water
Ice water keeps the dough cold and prevents the butter from melting. Measure it over ice cubes, then discard any unmelted ice before using.
1 cup (170g) semisweet chocolate chips
Semisweet chips melt into a balanced, not-too-sweet fudge. Chopped dark chocolate (60 to 70 percent) works beautifully if you prefer a deeper, less sweet filling.
1/2 cup (120ml) sweetened condensed milk
This is the shortcut that makes the fudge thick and glossy without any candy thermometer. Full-fat coconut condensed milk is the best dairy-free substitute.
2 tablespoons (28g) unsalted butter, for the filling
A little butter keeps the cooled fudge soft and sliceable. Salted butter is fine here; just skip the pinch of salt that follows.
1/4 teaspoon flaky sea salt, plus more for sprinkling
Flaky salt cuts the sweetness and adds little crunchy pops. Maldon or fleur de sel are ideal; regular table salt is too fine and will taste harsh.
1 large egg, beaten with 1 tablespoon water (egg wash)
The egg wash gives the pastry its shiny, golden finish and helps the edges seal. For an egg-free version, brush with heavy cream or whole milk instead.
1/2 cup (60g) powdered sugar, sifted
Powdered sugar makes a smooth, pourable glaze. Sift it first or you will get lumpy icing; a squeeze of corn syrup makes it extra glossy.
1 to 2 tablespoons whole milk, for the glaze
Whole milk gives the glaze a rich consistency. Any milk or even water works in a pinch, added one teaspoon at a time until pourable.
1/2 teaspoon vanilla extract
Vanilla rounds out the chocolate and adds warmth to the glaze. Use pure vanilla for the best flavor; imitation will taste flat.
Tips & Tricks
Keep Everything Cold
Warm butter makes the dough greasy and tough. If your kitchen is hot, chill the flour and your bowl for 10 minutes before starting, and work quickly.
Seal the Edges Thoroughly
Press the tines of a fork firmly all the way around each pop-tart. Any gap lets the fudge escape and burn on the baking sheet.
Do Not Overbake
Pull them when the edges are set and barely golden, around 18 minutes. Overbaking dries out the filling and makes the crust crackery.
Cool Before Glazing
Let the pop-tarts cool for at least 15 minutes. Glazing a hot pastry makes the icing slide right off.
Pro Tips
Step-by-Step Instructions
1. Make the Fudge Filling
Combine the chocolate chips, sweetened condensed milk, 2 tablespoons butter, and 1/4 teaspoon flaky salt in a small saucepan over medium-low heat (about 250F/120C). Stir constantly for 4 to 5 minutes until the chocolate is fully melted and the mixture is glossy and thick enough to coat the back of a spoon. Scrape into a shallow bowl and refrigerate for 20 minutes until firm but still spreadable.
2. Mix the Dough
Whisk the flour and fine sea salt in a large bowl. Add the cold cubed butter and toss to coat, then use your fingertips or a pastry cutter to work it in until the pieces are the size of small peas with a few larger flakes remaining. Drizzle in the ice water and stir with a fork until a shaggy dough forms.
3. Chill the Dough
Turn the dough onto a floured surface, gather it into two flat discs, and wrap each in plastic. Refrigerate for at least 30 minutes so the flour hydrates and the butter firms up, which is what creates flaky layers.
4. Roll and Cut
Roll one disc on a lightly floured surface to a 1/8-inch (3mm) thickness. Trim into a 10 by 12-inch rectangle, then cut into six 3 by 4-inch rectangles. Repeat with the second disc so you have 12 rectangles total.
5. Fill and Seal
Spoon about 1 1/2 tablespoons of chilled fudge onto the center of 6 rectangles, leaving a 1/2-inch border. Brush the border with egg wash, top with a second rectangle, and press the tines of a fork firmly around all four edges to seal. Prick the top of each three times with a fork.
6. Bake Until Golden
Heat the oven to 375F (190C) and line a baking sheet with parchment. Brush the tops with egg wash and bake for 16 to 19 minutes, until the edges are golden brown and the tops look dry and set. The internal edges should feel firm, not doughy, when pressed.
7. Glaze and Finish
Whisk the powdered sugar, milk, and vanilla until smooth and pourable, about 30 seconds. Let the pop-tarts cool on the sheet for 15 minutes, then spread or drizzle the glaze over the tops and finish with a pinch of flaky sea salt.
Delicious Variations
S'mores Pop-Tarts
Swap half the fudge for marshmallow creme and sprinkle crushed graham crackers over the glaze.
Raspberry Fudge Pop-Tarts
Spread a thin layer of seedless raspberry jam under the fudge for a tart, fruity contrast.
White Chocolate Peppermint Pop-Tarts
Use white chocolate chips in the fudge and add 1/4 teaspoon peppermint extract plus crushed candy canes on top.
How to Store Homemade Chocolate Fudge Pop-Tarts
Refrigerator
Store glazed pop-tarts in an airtight container at room temperature for up to 3 days, or refrigerate for up to 5 days. Bring to room temperature before eating for the best texture.
Freezer
Wrap unbaked assembled pop-tarts tightly in plastic and freeze for up to 3 months. Bake from frozen at 375F (190C) for 22 to 25 minutes. Baked and glazed pop-tarts can also be frozen and thawed overnight.
Reheating
Reheat in a 350F (175C) oven for 5 to 6 minutes, or in a toaster on a low setting, until the pastry crisps and the fudge softens. Avoid the microwave, which makes the crust soggy.
Frequently Asked Questions
Q: Can I use store-bought pie crust instead of making the dough?
Yes, two refrigerated pie crusts work as a fast shortcut, though the result will be slightly less buttery and flaky. Roll each crust slightly thinner, cut your rectangles, and reduce the baking time to 14 to 16 minutes since store-bought crust browns faster.
Q: Why did my fudge filling leak out during baking?
The most common cause is under-sealing the edges or using filling that is too warm. Press the fork tines firmly all the way through both layers of dough, and chill the filled pop-tarts for 15 minutes before baking so the fudge stays put.
Q: How do I keep the pop-tarts from getting soggy?
Let them cool completely on a wire rack before storing, and never seal them in a container while warm. If you refrigerate them, reheat in the oven or toaster rather than the microwave to bring the crust back to crisp.
Q: Can I make these gluten-free or dairy-free?
Yes, use a 1:1 gluten-free all-purpose baking blend and full-fat coconut condensed milk with dairy-free chocolate and butter. The dough will be a bit more fragile, so handle it gently and chill it well before rolling.
Q: How do I know when the pop-tarts are fully baked?
The edges should be golden brown and the tops dry and set, about 16 to 19 minutes at 375F (190C). If the center still looks shiny or wet, give them 2 more minutes; the fudge should be bubbling slightly at the vents.
Grab your rolling pin and a bag of chocolate chips, and make a batch of these homemade chocolate fudge pop-tarts this weekend. Once you taste that flaky crust and molten fudge center, the boxed version will never satisfy you again. Bake a double batch and freeze half for busy mornings.
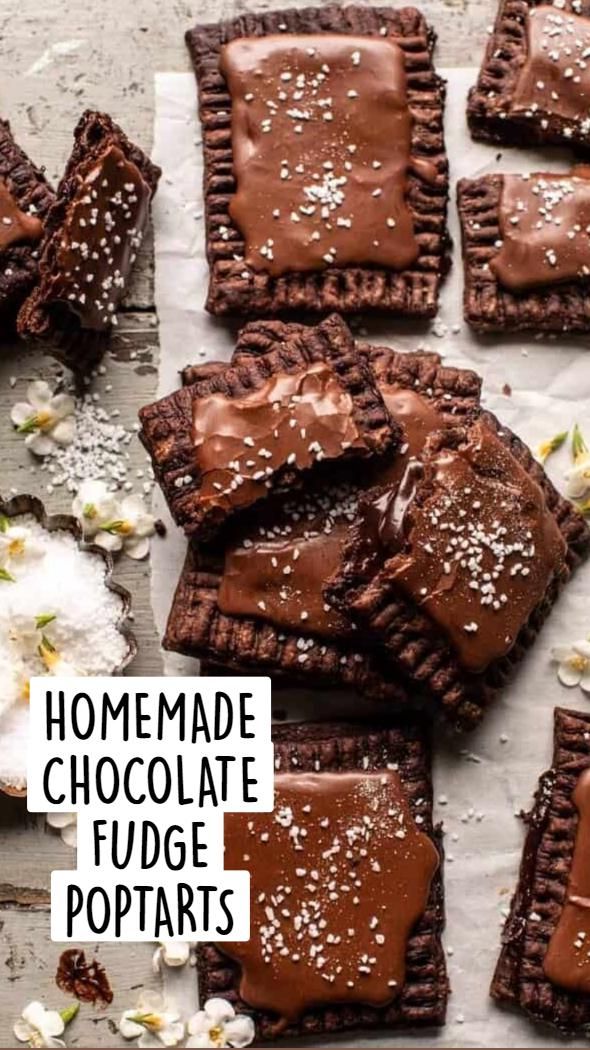
Homemade Chocolate Fudge Pop-Tarts
Homemade chocolate fudge pop-tarts deliver flaky golden pastry around a rich, glossy fudge center, turning a childhood favorite into a bakery-worthy treat.
🧂 Ingredients
- 2 1/2 cups (313g) all-purpose flour, plus more for dusting
- 1 cup (227g) cold unsalted butter, cubed
- 1/2 teaspoon fine sea salt
- 1/2 cup (120ml) ice-cold water
- 1 cup (170g) semisweet chocolate chips
- 1/2 cup (120ml) sweetened condensed milk
- 2 tablespoons (28g) unsalted butter, for the filling
- 1/4 teaspoon flaky sea salt, plus more for sprinkling
- 1 large egg, beaten with 1 tablespoon water (egg wash)
- 1/2 cup (60g) powdered sugar, sifted
- 1 to 2 tablespoons whole milk, for the glaze
- 1/2 teaspoon vanilla extract
📋 Instructions
- 1Make the Fudge Filling — Combine the chocolate chips, sweetened condensed milk, 2 tablespoons butter, and 1/4 teaspoon flaky salt in a small saucepan over medium-low heat (about 250F/120C). Stir constantly for 4 to 5 minutes until the chocolate is fully melted and the mixture is glossy and thick enough to coat the back of a spoon. Scrape into a shallow bowl and refrigerate for 20 minutes until firm but still spreadable.
- 2Mix the Dough — Whisk the flour and fine sea salt in a large bowl. Add the cold cubed butter and toss to coat, then use your fingertips or a pastry cutter to work it in until the pieces are the size of small peas with a few larger flakes remaining. Drizzle in the ice water and stir with a fork until a shaggy dough forms.
- 3Chill the Dough — Turn the dough onto a floured surface, gather it into two flat discs, and wrap each in plastic. Refrigerate for at least 30 minutes so the flour hydrates and the butter firms up, which is what creates flaky layers.
- 4Roll and Cut — Roll one disc on a lightly floured surface to a 1/8-inch (3mm) thickness. Trim into a 10 by 12-inch rectangle, then cut into six 3 by 4-inch rectangles. Repeat with the second disc so you have 12 rectangles total.
- 5Fill and Seal — Spoon about 1 1/2 tablespoons of chilled fudge onto the center of 6 rectangles, leaving a 1/2-inch border. Brush the border with egg wash, top with a second rectangle, and press the tines of a fork firmly around all four edges to seal. Prick the top of each three times with a fork.
- 6Bake Until Golden — Heat the oven to 375F (190C) and line a baking sheet with parchment. Brush the tops with egg wash and bake for 16 to 19 minutes, until the edges are golden brown and the tops look dry and set. The internal edges should feel firm, not doughy, when pressed.
- 7Glaze and Finish — Whisk the powdered sugar, milk, and vanilla until smooth and pourable, about 30 seconds. Let the pop-tarts cool on the sheet for 15 minutes, then spread or drizzle the glaze over the tops and finish with a pinch of flaky sea salt.