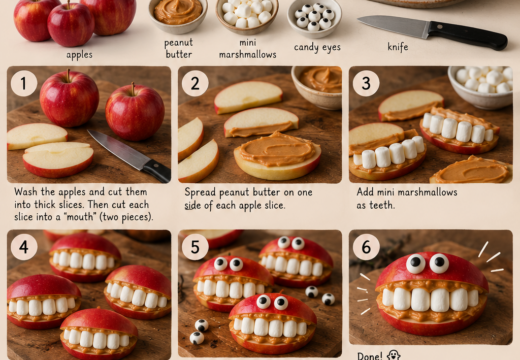
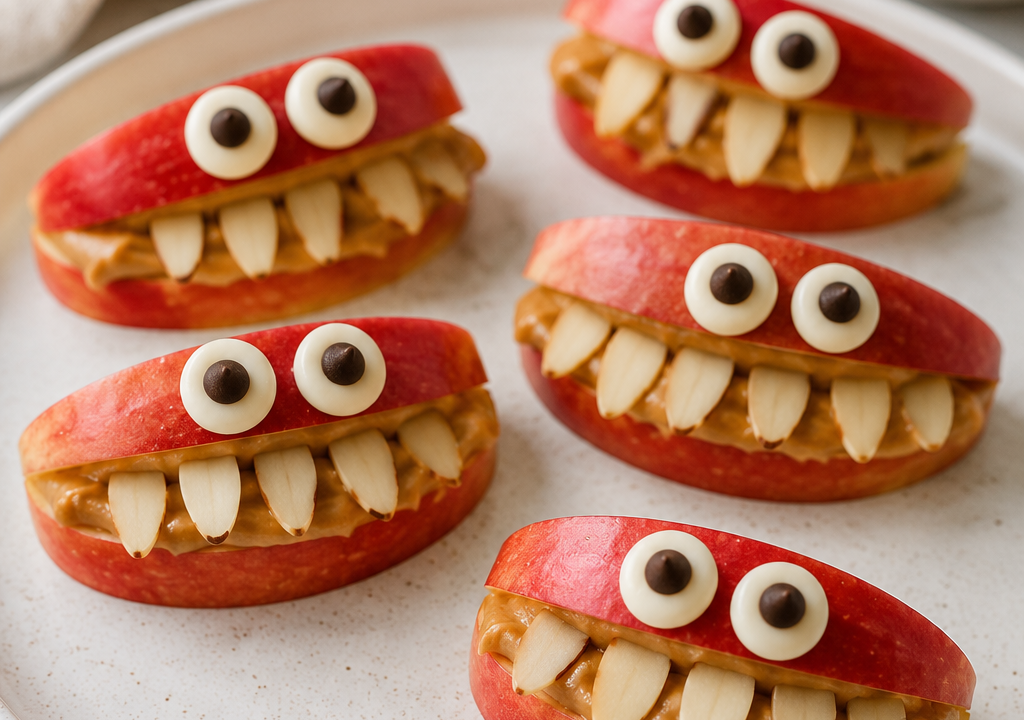
Halloween Monster Apple Bites earn a permanent spot in our October rotation because they take twenty minutes, need no oven, and get kids giggling at the table before the candy even shows up.
You slice apples into wedges, spread them with peanut butter, and press on teeth and eyes until each one looks like a little grinning monster. My kids fight over who gets to place the last eyeball, which is exactly the kind of help I want in the kitchen.
They hold up beautifully on a party tray for an hour or two, and they count as a real snack with fruit and protein instead of pure sugar. That balance is why I make a double batch every single year.
Why You'll Love This Recipe
About the Ingredients
4 medium crisp apples (Honeycrisp, Fuji, or Gala)
Firm, tart-sweet apples hold their shape and resist browning best. If you only have softer apples, use them anyway but cut thicker wedges so they don't flop.
1 cup (250g) creamy peanut butter
Creamy spreads in one smooth swipe; chunky works but makes lumpy monster faces. Swap in sunflower seed butter or almond butter for a nut-free or different-flavor version.
2 tbsp (30g) unsalted butter, softened
A little butter keeps the peanut butter from cracking when you press in the decorations. Salted butter is fine too, just skip any added salt.
1 tbsp (15ml) fresh lemon juice
Lemon juice slows browning on the cut apple faces. Bottled lemon juice works in a pinch, and a quick dip in cold water with lemon does the same job.
24 mini marshmallows
These become the teeth; mini marshmallows are the right size for small apple wedges. Swap in yogurt-covered raisins or white chocolate chips if marshmallows aren't on hand.
24 candy eyeballs (about 1/2 cup)
Look for the small edible sugar eyeballs in the baking aisle. If you can't find them, a dab of white frosting with a mini chocolate chip pressed in makes a fine homemade eye.
2 tbsp (30g) mini chocolate chips
These add pupils or hair tufts for extra personality. Regular chocolate chips chopped small work just as well.
1 tsp (5g) flaky sea salt, optional
A tiny pinch on top cuts the sweetness and makes the peanut butter pop. Skip it if you're using salted butter and salted peanut butter.
Tips & Tricks
Dry the apples well
Pat each wedge thoroughly with paper towels before spreading peanut butter, or the spread slides right off the wet surface.
Spread to the edge
Bring the peanut butter all the way to one cut edge so the marshmallow teeth have something to stick to.
Chill before decorating
Ten minutes in the fridge firms up the peanut butter so the eyes stay put instead of sliding down the face.
Serve cut side down
Stand the wedges on their peel edge on the platter so the monster faces point up and stay intact.
Pro Tips
Step-by-Step Instructions
1. Prep the apples
Wash and dry 4 apples, then cut each into 8 wedges and remove the core. Toss the wedges in a bowl with 1 tbsp lemon juice and 1 tbsp cold water for 30 seconds, then drain and pat completely dry with paper towels.
2. Whip the spread
Stir together 1 cup peanut butter and 2 tbsp softened butter in a small bowl until smooth and glossy, about 1 minute. This loosens the peanut butter so it spreads without tearing the apple skin.
3. Spread the faces
Lay the apple wedges peel-side down on a parchment-lined tray and spread about 1 tbsp of the peanut butter mixture over the cut face of each wedge, leaving a small border at the bottom for the mouth.
4. Chill to set
Slide the tray into the refrigerator for 10 minutes, until the peanut butter is firm to the touch but still slightly tacky, which is when decorations hold best.
5. Add the teeth
Press 2 to 3 mini marshmallows along the bottom edge of each wedge to make a jagged grin, pushing gently so they sink about a quarter inch into the spread.
6. Place the eyes
Set 2 candy eyeballs near the top of each wedge, pressing lightly for 2 seconds each. Add 2 mini chocolate chips above the eyes for hair if you like.
7. Finish and serve
Sprinkle a tiny pinch of flaky salt over the tray if using, then serve right away or chill up to 1 hour before the party. Arrange them standing on their peel edges so the faces stay upright.
Delicious Variations
Nut-Free Monsters
Use sunflower seed butter or cream cheese instead of peanut butter so every kid at the table can join in.
Chocolate-Dipped Bites
Dip the bottom third of each apple wedge in melted chocolate, let it set 10 minutes, then add the peanut butter and eyes on top.
Green Goblin Apples
Stir a few drops of green food coloring into the peanut butter for a swampy monster look that kids find hilarious.
How to Store Halloween Monster Apple Bites 🎃🍎 | Easy Kids Snack
Refrigerator
Store in a single layer in an airtight container in the refrigerator for up to 24 hours; the apples soften and brown after that, so they're best the day they're made.
Freezer
Not recommended, because the apples turn mushy and the marshmallows weep once thawed.
Reheating
No reheating needed; serve cold or at cool room temperature, and refresh the eyes if any slide off after storage.
Frequently Asked Questions
Q: How do you keep apple slices from turning brown for a party?
Toss the cut wedges in lemon juice and cold water for about 30 seconds, then dry them well before spreading. This buys you a couple of bright hours, and the peanut butter coating protects the cut face even longer.
Q: Can I make Halloween apple bites ahead of time?
You can assemble them up to 24 hours ahead and keep them covered in the fridge, though they look best within a few hours. For the crispest texture, slice and decorate the morning of your party.
Q: What can I use instead of peanut butter for a nut-free version?
Sunflower seed butter, cream cheese, or thick vanilla yogurt all work as the spread. Sunflower seed butter holds its shape best and tastes closest to the original.
Q: Are candy eyeballs safe for young kids?
The standard sugar eyeballs are edible and safe for kids over three, but they are a choking hazard for toddlers. For little ones, use a dot of cream cheese with a mini chocolate chip instead.
Q: How many apple bites does this recipe make?
This makes about 32 monster bites, which serves 6 as a snack or 10 to 12 as part of a party spread. Each apple yields 8 wedges, so scale up by buying one extra apple per four guests.
Grab your apples and let the kids take over the decorating table this Halloween, then snap a photo of your silliest monster before it disappears. Cook it your way, and tell me how it went.
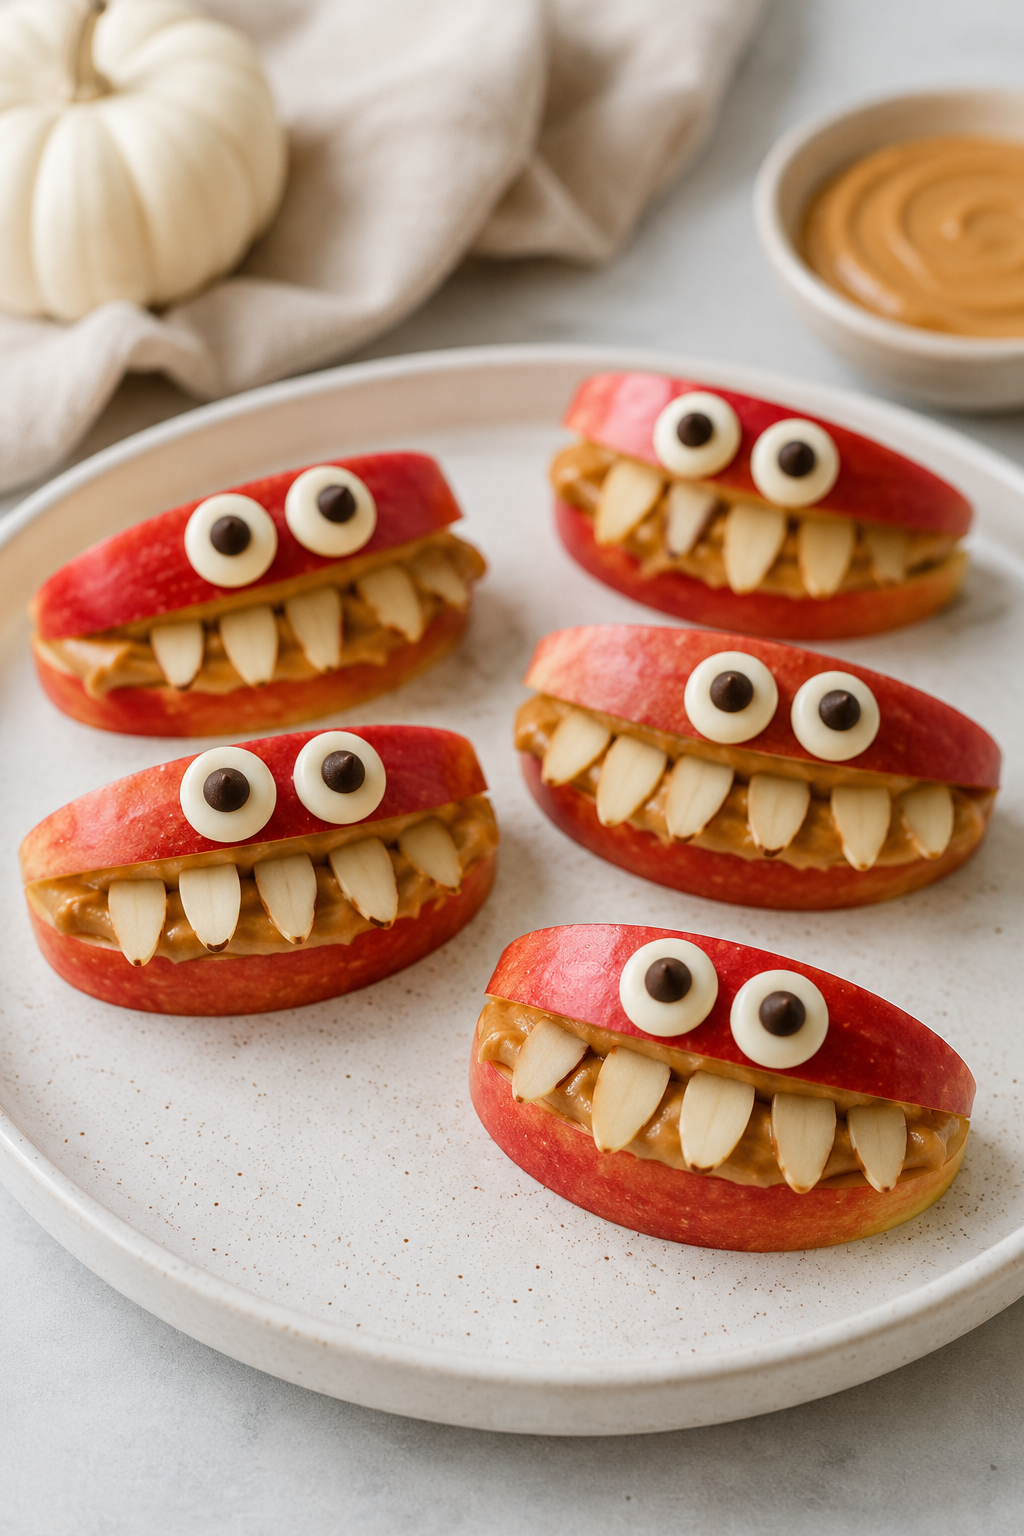
Halloween Monster Apple Bites 🎃🍎 | Easy Kids Snack
Halloween Monster Apple Bites turn crisp apple wedges, peanut butter, and googly eyes into a silly 20-minute no-bake snack kids devour.
🧂 Ingredients
- 4 medium crisp apples (Honeycrisp, Fuji, or Gala)
- 1 cup (250g) creamy peanut butter
- 2 tbsp (30g) unsalted butter, softened
- 1 tbsp (15ml) fresh lemon juice
- 24 mini marshmallows
- 24 candy eyeballs (about 1/2 cup)
- 2 tbsp (30g) mini chocolate chips
- 1 tsp (5g) flaky sea salt, optional
📋 Instructions
- 1Prep the apples — Wash and dry 4 apples, then cut each into 8 wedges and remove the core. Toss the wedges in a bowl with 1 tbsp lemon juice and 1 tbsp cold water for 30 seconds, then drain and pat completely dry with paper towels.
- 2Whip the spread — Stir together 1 cup peanut butter and 2 tbsp softened butter in a small bowl until smooth and glossy, about 1 minute. This loosens the peanut butter so it spreads without tearing the apple skin.
- 3Spread the faces — Lay the apple wedges peel-side down on a parchment-lined tray and spread about 1 tbsp of the peanut butter mixture over the cut face of each wedge, leaving a small border at the bottom for the mouth.
- 4Chill to set — Slide the tray into the refrigerator for 10 minutes, until the peanut butter is firm to the touch but still slightly tacky, which is when decorations hold best.
- 5Add the teeth — Press 2 to 3 mini marshmallows along the bottom edge of each wedge to make a jagged grin, pushing gently so they sink about a quarter inch into the spread.
- 6Place the eyes — Set 2 candy eyeballs near the top of each wedge, pressing lightly for 2 seconds each. Add 2 mini chocolate chips above the eyes for hair if you like.
- 7Finish and serve — Sprinkle a tiny pinch of flaky salt over the tray if using, then serve right away or chill up to 1 hour before the party. Arrange them standing on their peel edges so the faces stay upright.

Mireille writes about weeknight cooking built around what is already in the pantry, with a focus on Haitian and Caribbean home dishes made simpler for busy kitchens. She favors short ingredient lists, honest substitutions, and recipes that forgive a missed step. Her angle is feeding a household well without a second trip to the store.