

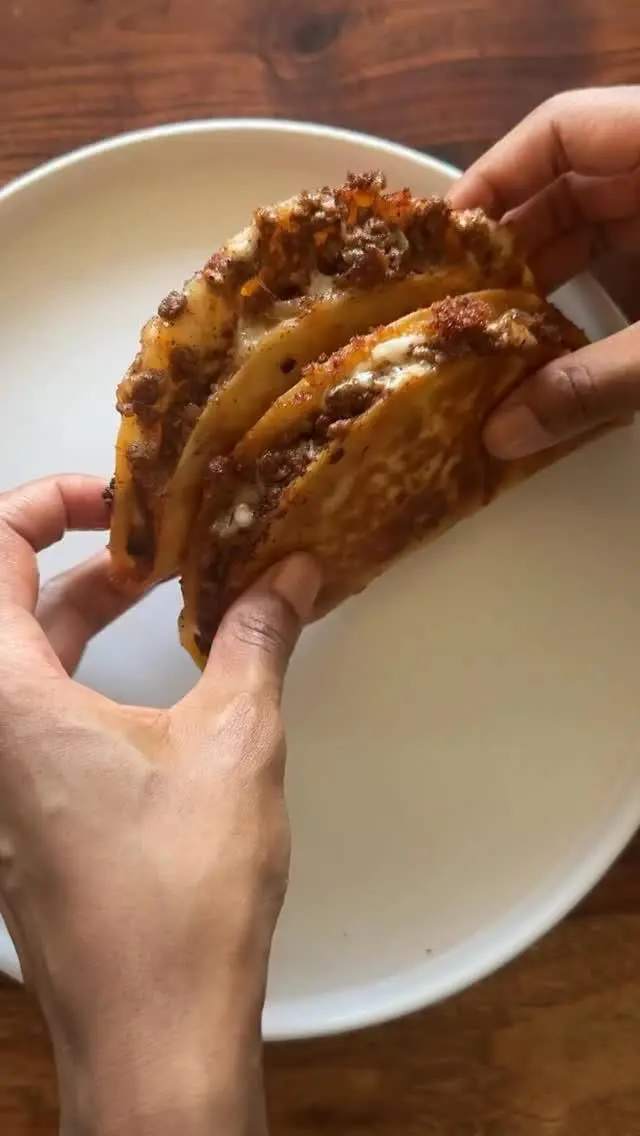
Crispy beef tacos earn a permanent spot in my weekly rotation because they give you that drive-thru crunch at home, with beef you seasoned yourself and cheese that actually melts into the meat instead of sliding off.
The trick is simple: brush corn tortillas with a little oil, fill them with seasoned beef and shredded cheese, then bake them folded in a muffin tin or propped on a rack until the edges go golden and crisp. No deep frying, no splatter, no stress.
I keep the filling mild so everyone at the table can pile on their own toppings, and the shells stay crunchy for a good twenty minutes after they come out of the oven, which is exactly how long it takes my family to finish the first batch.
Why You'll Love This Recipe
About the Ingredients
1 lb (450g) ground beef, 80/20
The 20 percent fat keeps the filling juicy; ground turkey or chicken works too, but add a tablespoon of oil to the pan since they are leaner.
1 small yellow onion, finely diced (about 1 cup / 160g)
White onion is sharper and more traditional; sweet onion is milder if you are feeding kids.
2 cloves garlic, minced
Fresh garlic gives the best flavor; 1/2 teaspoon garlic powder is a fine swap in a pinch.
1 packet (1 oz / 28g) taco seasoning, or 2 tablespoons homemade
Check the label for salt level; if yours is low-sodium, taste the beef before adding extra salt.
1/2 cup (120ml) water
The water lets the seasoning bloom into a saucy coating instead of dry clumps; beef broth makes it richer.
12 corn tortillas (6-inch / 15cm)
Corn tortillas crisp far better than flour in the oven; look for ones that bend without cracking, which means they are fresh.
2 tablespoons vegetable oil, for brushing
Avocado or canola oil works equally well; melted butter gives a richer, slightly nutty shell.
2 cups (225g) shredded cheddar or Mexican blend cheese
Buy a block and shred it yourself; pre-shredded cheese is coated with starch and melts less smoothly.
1 cup (180g) shredded lettuce, for serving
Iceberg stays crisp longest; romaine or cabbage are crunchier alternatives.
1 cup (180g) diced tomatoes, for serving
Roma tomatoes are firm and less watery; drained canned diced tomatoes work off-season.
1/2 cup (120g) sour cream, for serving
Greek yogurt is a tangier, lighter substitute; thin either with a splash of lime juice for drizzling.
Tips & Tricks
Warm the tortillas first
20 seconds each in a dry skillet or 30 seconds wrapped in damp paper towels in the microwave keeps them from cracking when you fold them.
Drain the beef well
tilt the pan and spoon off excess fat before adding seasoning, or the filling turns greasy and the shells go soggy.
Do not overfill
about 2 tablespoons of beef and 1 tablespoon of cheese per tortilla is the sweet spot, since overstuffed shells split and leak.
Crisp them on a rack
standing the tacos in the cups of a muffin tin or draping them over the bars of an oven rack lets hot air hit both sides.
Pro Tips
Step-by-Step Instructions
1. Heat the oven
Preheat the oven to 400F (200C) and set a rack in the middle position. Lightly brush both sides of each tortilla with oil and warm them for 20 seconds each in a dry skillet over medium heat until pliable, about 2 minutes total.
2. Brown the beef
Heat a large skillet over medium-high heat, about 375F (190C) on an instant-read thermometer if you have one, and cook the beef and onion for 6 to 7 minutes, breaking it up, until no pink remains and the onion is soft and translucent.
3. Add the garlic
Stir in the garlic and cook for 30 seconds until fragrant, just until you can smell it, being careful not to let it brown.
4. Season and simmer
Sprinkle in the taco seasoning and pour in the water. Simmer for 3 to 4 minutes, stirring, until the liquid thickens into a glossy sauce that coats the meat, then taste and adjust salt.
5. Fill the shells
Spoon about 2 tablespoons of beef into the center of each tortilla, top with 1 tablespoon of cheese, then fold the tortilla over. Press gently so it holds its shape.
6. Bake until crisp
Stand the filled tacos in the cups of a muffin tin, or drape them over the bars of the oven rack. Bake for 12 to 15 minutes until the edges are golden brown and the cheese is bubbling, and the shells feel firm when tapped.
7. Cool briefly
Let the tacos rest for 2 minutes so the cheese sets slightly and the shells firm up, which keeps them from falling apart when you pick them up.
8. Load the toppings
Tuck in lettuce and tomatoes and add a dollop of sour cream, then serve right away while the shells are still crunchy.
Delicious Variations
Chicken Cheddar Tacos
Swap the beef for 1 lb shredded cooked chicken and stir it into the seasoning with just 1/4 cup water.
Spicy Jalapeno Tacos
Add 1 diced jalapeno with the onion and use pepper jack cheese for a sharper kick.
Beef and Bean Tacos
Stir 1 cup (240g) refried beans into the seasoned beef for a heartier, stretchier filling that feeds seven.
How to Store Crispy Beef Tacos
Refrigerator
Store the beef filling in an airtight container for up to 3 days; keep baked shells separate and unfilled, since they soften once filled.
Freezer
Freeze the cooled filling in a zip-top bag for up to 2 months; freeze unfilled tortillas flat with parchment between them.
Reheating
Reheat the filling in a skillet over medium heat for 4 to 5 minutes with a splash of water, then fill fresh or re-crisped shells at 400F (200C) for 5 minutes.
Frequently Asked Questions
Q: Why did my taco shells turn out soggy?
The shells went soggy because the filling was too wet or the tortillas were overfilled. Drain the beef fat, simmer the seasoning until the sauce clings, and use no more than 2 tablespoons of filling per shell.
Q: Can I make crispy beef tacos ahead of time?
Yes, you can make the beef filling up to 3 days ahead and refrigerate it, but bake the shells fresh. Assembled tacos soften within about 30 minutes, so bake them right before serving.
Q: How do I keep corn tortillas from cracking when I fold them?
Warm the tortillas until they are soft and pliable before folding, either 20 seconds per side in a dry skillet or 30 seconds wrapped in damp paper towels in the microwave. Cold tortillas are the number one cause of splits.
Q: Can I use flour tortillas instead of corn?
Yes, but flour tortillas soften rather than crisp in the oven, so expect a chewier texture. If you want crunch with flour tortillas, bake them 3 to 4 minutes longer and brush them a little more generously with oil.
Q: What is the best cheese for crispy beef tacos?
Cheddar or a Mexican blend melts best and browns nicely at the edges. Shred a block yourself rather than buying pre-shredded, since the anti-caking starch keeps it from melting smoothly.
Set out the toppings, let everyone build their own, and watch the plate clear in minutes. If yours go a little too dark at the edges, just trim them and no one will mind. Cook it your way, and tell me how it went.
Crispy Beef Tacos
Crispy beef tacos bake up golden and shatteringly crunchy with seasoned ground beef and melty cheese, ready in under an hour for a fun family dinner.
🧂 Ingredients
- 1 lb (450g) ground beef, 80/20
- 1 small yellow onion, finely diced (about 1 cup / 160g)
- 2 cloves garlic, minced
- 1 packet (1 oz / 28g) taco seasoning, or 2 tablespoons homemade
- 1/2 cup (120ml) water
- 12 corn tortillas (6-inch / 15cm)
- 2 tablespoons vegetable oil, for brushing
- 2 cups (225g) shredded cheddar or Mexican blend cheese
- 1 cup (180g) shredded lettuce, for serving
- 1 cup (180g) diced tomatoes, for serving
- 1/2 cup (120g) sour cream, for serving
📋 Instructions
- 1Heat the oven — Preheat the oven to 400F (200C) and set a rack in the middle position. Lightly brush both sides of each tortilla with oil and warm them for 20 seconds each in a dry skillet over medium heat until pliable, about 2 minutes total.
- 2Brown the beef — Heat a large skillet over medium-high heat, about 375F (190C) on an instant-read thermometer if you have one, and cook the beef and onion for 6 to 7 minutes, breaking it up, until no pink remains and the onion is soft and translucent.
- 3Add the garlic — Stir in the garlic and cook for 30 seconds until fragrant, just until you can smell it, being careful not to let it brown.
- 4Season and simmer — Sprinkle in the taco seasoning and pour in the water. Simmer for 3 to 4 minutes, stirring, until the liquid thickens into a glossy sauce that coats the meat, then taste and adjust salt.
- 5Fill the shells — Spoon about 2 tablespoons of beef into the center of each tortilla, top with 1 tablespoon of cheese, then fold the tortilla over. Press gently so it holds its shape.
- 6Bake until crisp — Stand the filled tacos in the cups of a muffin tin, or drape them over the bars of the oven rack. Bake for 12 to 15 minutes until the edges are golden brown and the cheese is bubbling, and the shells feel firm when tapped.
- 7Cool briefly — Let the tacos rest for 2 minutes so the cheese sets slightly and the shells firm up, which keeps them from falling apart when you pick them up.
- 8Load the toppings — Tuck in lettuce and tomatoes and add a dollop of sour cream, then serve right away while the shells are still crunchy.

Mireille writes about weeknight cooking built around what is already in the pantry, with a focus on Haitian and Caribbean home dishes made simpler for busy kitchens. She favors short ingredient lists, honest substitutions, and recipes that forgive a missed step. Her angle is feeding a household well without a second trip to the store.