

Chinese takeout sesame chicken earns a permanent spot in my weekly rotation because it hits every note my family craves: shatteringly crisp chicken, a sticky honey-soy glaze, and that nutty shower of toasted sesame seeds, all from one pan on my own stove.
The trick that makes it work at home is a two-stage coat, cornstarch first then a quick dip in beaten egg, which fries up lighter and crunchier than the flour-heavy versions from the corner shop. The sauce comes together in the same pan in about three minutes, so nothing sits around getting soggy.
You do not need a wok or a deep fryer. A heavy skillet with an inch of oil and a thermometer will do the job beautifully, and the whole thing lands on the table in under an hour.
Why You'll Love This Recipe
About the Ingredients
1 3/4 pounds (800g) boneless skinless chicken thighs, cut into 1-inch pieces
Thighs stay juicy under high heat; if you only have breasts, cut them the same size and pull them from the oil at 160F (71C) so they do not dry out. Buy thighs that look moist and pink, not gray.
2 large eggs, beaten
The egg dip is what makes the cornstarch stick. No eggs? Whisk 1/4 cup buttermilk or 3 tablespoons cornstarch slurry with 1/4 cup water instead.
3/4 cup (90g) cornstarch
Cornstarch gives the lightest, crackliest crust. Potato starch works one-for-one, but all-purpose flour turns gummy in this wet coating, so skip it.
1/2 cup (120ml) neutral oil, such as canola or peanut, for frying
You want about 1/2 inch of oil in the pan. Peanut oil tastes most like takeout and handles heat well; canola is the cheaper, neutral standby.
1/3 cup (80ml) low-sodium soy sauce
Low-sodium keeps the glaze from getting salty after it reduces. Tamari is a great gluten-free swap, and coconut aminos work if you cut the honey to 3 tablespoons.
1/4 cup (85g) honey
Honey gives the glossy, sticky finish. Maple syrup or light brown sugar (packed) both substitute well, though brown sugar makes the sauce slightly less shiny.
2 tablespoons rice vinegar
Rice vinegar is mild and bright. Apple cider vinegar is the closest pantry swap; use 1 tablespoon only, since it is sharper.
2 tablespoons ketchup
Ketchup adds tang and body without tasting like ketchup in the finished dish. Tomato paste thinned with 1 tablespoon water is a good stand-in.
3 cloves garlic, minced, plus 1 teaspoon grated fresh ginger
Fresh aromatics bloomed for 30 seconds are the backbone of the sauce. Jarred garlic works in a pinch; use 1 teaspoon and add it with the liquids so it does not burn.
2 tablespoons toasted sesame seeds, plus 1 teaspoon toasted sesame oil
Toast seeds in a dry pan over medium heat for 2 to 3 minutes until they smell nutty and start popping. Buy sesame oil labeled toasted, not plain, or you will lose the flavor.
4 scallions, thinly sliced, plus steamed rice for serving
Scallions add freshness and crunch at the end. Thinly sliced red onion or a handful of cilantro works if you are out.
Tips & Tricks
Keep the oil at 350F (175C)
Fry in batches of about 8 pieces so the temperature does not drop below 325F (165C); cold oil is the number one cause of greasy, pale chicken.
Coat right before frying
Toss the chicken in cornstarch and egg in small batches, because a wet coating that sits turns into a gluey shell that slides off in the oil.
Glaze off the heat
Whisk the sauce, simmer it 2 to 3 minutes until it coats a spoon, then pull the pan off the burner before adding the chicken so the honey does not scorch.
Dry the chicken well
Pat the pieces with paper towels before coating; surface moisture is what makes oil spit and the crust blister unevenly.
Pro Tips
Step-by-Step Instructions
1. Prep the chicken
Pat the chicken pieces very dry with paper towels and season lightly with salt. Set out two shallow bowls, one with the cornstarch and one with the beaten eggs, and keep them near the stove.
2. Whisk the sauce
In a small bowl, whisk the soy sauce, honey, rice vinegar, ketchup, garlic, ginger, and 1/4 cup water until smooth. Set it beside the stove so you can pour it in one motion later.
3. Heat the oil
Pour the neutral oil into a large heavy skillet to a depth of about 1/2 inch and heat over medium-high until it reaches 350F (175C) on a thermometer, roughly 5 to 6 minutes. A pinch of cornstarch should sizzle the moment it hits the oil.
4. Coat in batches
Working with about 8 pieces at a time, toss the chicken in cornstarch until fully dusted, then dip in egg, then back into the cornstarch for a second light coat. Shake off the excess so the pieces fry crisp rather than clumpy.
5. Fry until golden
Lower the coated pieces into the oil in a single layer and fry for 4 to 5 minutes, turning once, until deep golden brown and the internal temperature reads 175F (79C). Move the finished chicken to a wire rack set over a tray, not paper towels, so the bottom stays crisp.
6. Fry the rest
Let the oil return to 350F (175C) between batches, about 2 minutes each time, and skim out any stray bits of coating with a slotted spoon so they do not burn and flavor the oil.
7. Reduce the glaze
Pour off all but 1 tablespoon of the oil and lower the heat to medium. Pour in the sauce and simmer for 2 to 3 minutes, stirring, until it bubbles at the edges, darkens slightly, and coats the back of a spoon.
8. Toss and finish
Pull the pan off the heat, add the fried chicken, and toss gently until every piece is lacquered. Sprinkle with sesame seeds and scallions, drizzle with the toasted sesame oil, and serve right away over steamed rice.
Delicious Variations
Sesame Orange Chicken
Swap the honey for 3 tablespoons orange marmalade and add the zest of one orange to the sauce for a brighter, citrusy glaze.
Air Fryer Sesame Chicken
Spray the coated pieces generously with oil and air fry at 400F (205C) for 12 to 14 minutes, shaking halfway, then toss with the stovetop glaze.
Sesame Tofu or Cauliflower
Press and cube extra-firm tofu or cut cauliflower into florets, coat and fry the same way for 4 to 5 minutes, and keep the sauce exactly as written.
How to Store Chinese Takeout Sesame Chicken
Refrigerator
Store cooled chicken in an airtight container for up to 3 days; keep the rice separate so it does not turn gluey.
Freezer
Freeze the fried, unglazed chicken in a single layer for 2 hours, then bag it for up to 2 months; glaze fresh after reheating for the best crunch.
Reheating
Spread on a sheet pan and bake at 375F (190C) for 8 to 10 minutes, then toss with a splash of warmed sauce; the microwave softens the crust.
Frequently Asked Questions
Q: Why did my sesame chicken turn out soggy?
Soggy chicken almost always means the oil was too cool or the pan was overcrowded. Fry in small batches at a steady 350F (175C) and rest the pieces on a wire rack so steam escapes instead of collecting underneath.
Q: Can I make Chinese takeout sesame chicken without deep frying?
Yes, an air fryer or a hot oven works well. Air fry the coated pieces at 400F (205C) for 12 to 14 minutes, or bake on an oiled rack at 425F (220C) for 18 to 20 minutes, then toss with the stovetop glaze.
Q: What can I use instead of cornstarch for the coating?
Potato starch is the best one-for-one swap and fries up just as crisp. Arrowroot also works, but avoid all-purpose flour because it absorbs the sauce and turns pasty within minutes.
Q: How do I make the sauce less sweet?
Cut the honey to 2 tablespoons and add an extra tablespoon of rice vinegar. The vinegar balances the sugar without making the glaze sour, and the sauce still thickens properly.
Q: Can I prep sesame chicken ahead of time?
You can coat and fry the chicken up to a day ahead and refrigerate it uncovered, then reheat at 375F (190C) for 8 minutes before glazing. Make the sauce fresh, since honey-based glazes thicken too much when chilled.
Give this one a try on your next takeout night and see how fast the plate clears. Cook it your way, and tell me how it went.
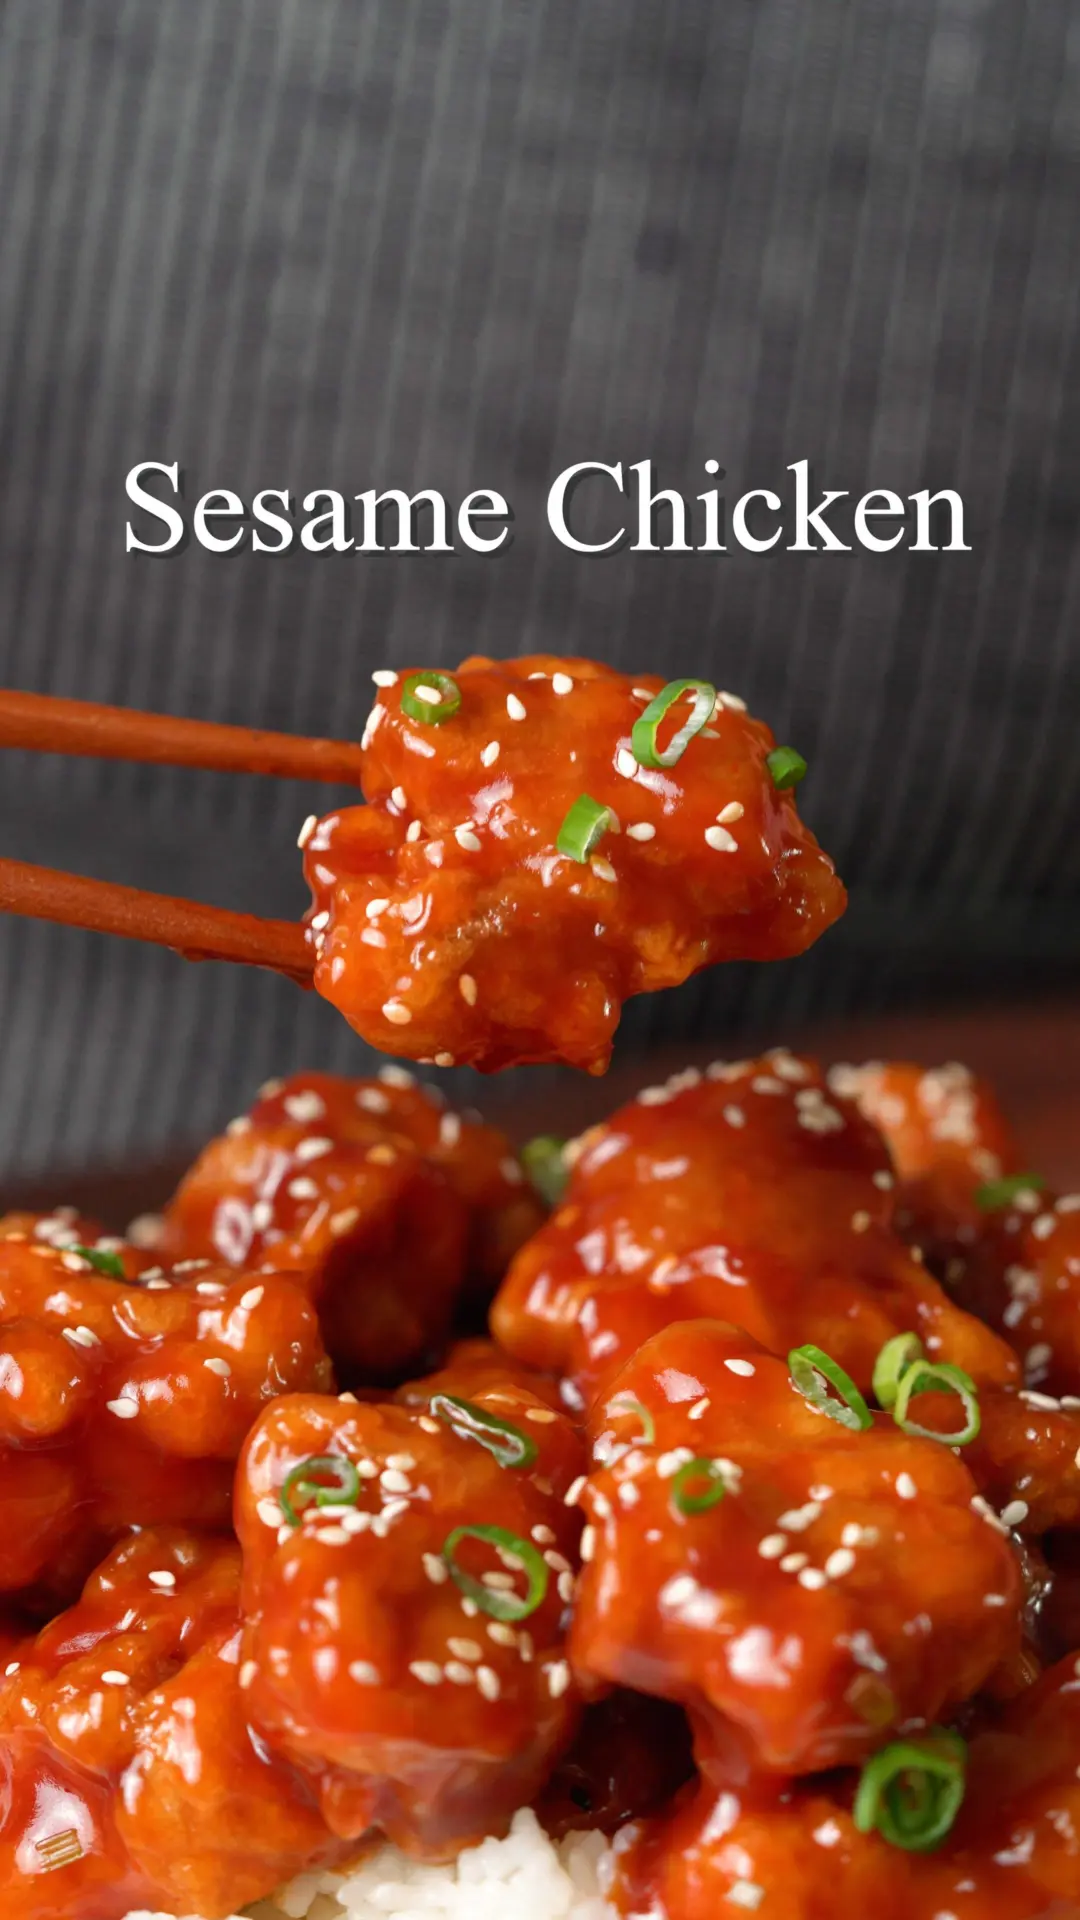
Chinese Takeout Sesame Chicken
Skip the delivery app tonight: Chinese takeout sesame chicken with a glossy sweet-savory glaze, crackly coating, and toasted seeds, made at home.
🧂 Ingredients
- 1 3/4 pounds (800g) boneless skinless chicken thighs, cut into 1-inch pieces
- 2 large eggs, beaten
- 3/4 cup (90g) cornstarch
- 1/2 cup (120ml) neutral oil, such as canola or peanut, for frying
- 1/3 cup (80ml) low-sodium soy sauce
- 1/4 cup (85g) honey
- 2 tablespoons rice vinegar
- 2 tablespoons ketchup
- 3 cloves garlic, minced, plus 1 teaspoon grated fresh ginger
- 2 tablespoons toasted sesame seeds, plus 1 teaspoon toasted sesame oil
- 4 scallions, thinly sliced, plus steamed rice for serving
📋 Instructions
- 1Prep the chicken — Pat the chicken pieces very dry with paper towels and season lightly with salt. Set out two shallow bowls, one with the cornstarch and one with the beaten eggs, and keep them near the stove.
- 2Whisk the sauce — In a small bowl, whisk the soy sauce, honey, rice vinegar, ketchup, garlic, ginger, and 1/4 cup water until smooth. Set it beside the stove so you can pour it in one motion later.
- 3Heat the oil — Pour the neutral oil into a large heavy skillet to a depth of about 1/2 inch and heat over medium-high until it reaches 350F (175C) on a thermometer, roughly 5 to 6 minutes. A pinch of cornstarch should sizzle the moment it hits the oil.
- 4Coat in batches — Working with about 8 pieces at a time, toss the chicken in cornstarch until fully dusted, then dip in egg, then back into the cornstarch for a second light coat. Shake off the excess so the pieces fry crisp rather than clumpy.
- 5Fry until golden — Lower the coated pieces into the oil in a single layer and fry for 4 to 5 minutes, turning once, until deep golden brown and the internal temperature reads 175F (79C). Move the finished chicken to a wire rack set over a tray, not paper towels, so the bottom stays crisp.
- 6Fry the rest — Let the oil return to 350F (175C) between batches, about 2 minutes each time, and skim out any stray bits of coating with a slotted spoon so they do not burn and flavor the oil.
- 7Reduce the glaze — Pour off all but 1 tablespoon of the oil and lower the heat to medium. Pour in the sauce and simmer for 2 to 3 minutes, stirring, until it bubbles at the edges, darkens slightly, and coats the back of a spoon.
- 8Toss and finish — Pull the pan off the heat, add the fried chicken, and toss gently until every piece is lacquered. Sprinkle with sesame seeds and scallions, drizzle with the toasted sesame oil, and serve right away over steamed rice.

Mireille writes about weeknight cooking built around what is already in the pantry, with a focus on Haitian and Caribbean home dishes made simpler for busy kitchens. She favors short ingredient lists, honest substitutions, and recipes that forgive a missed step. Her angle is feeding a household well without a second trip to the store.