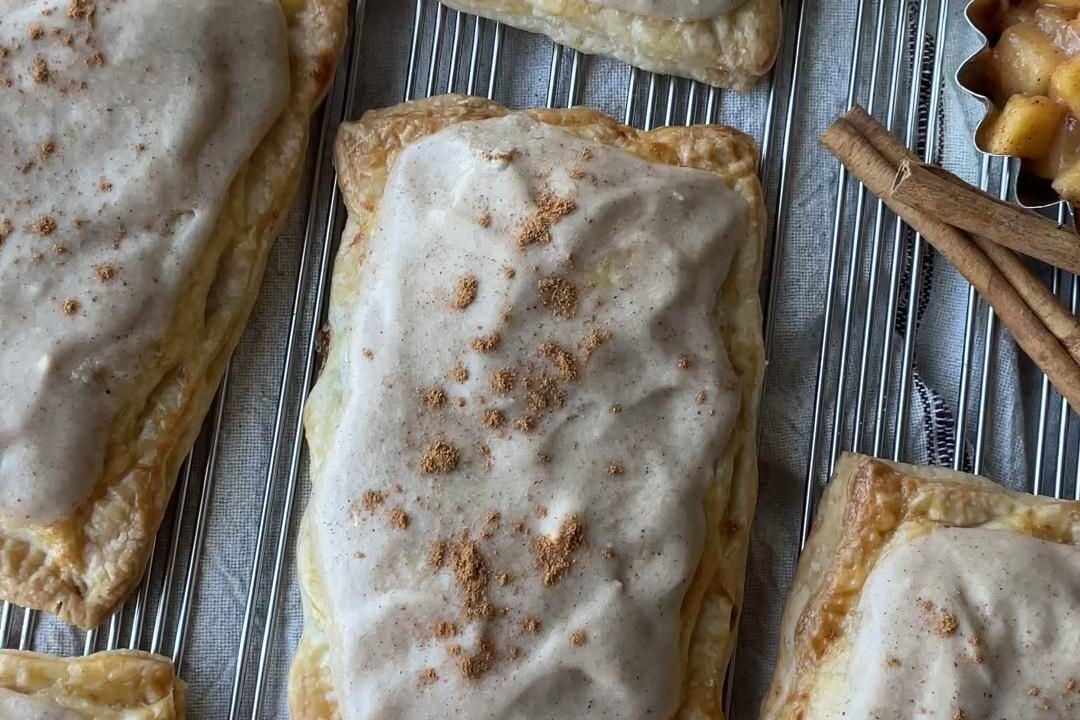
These Apple Cheesecake Pop-Tarts take everything you love about a toaster pastry and make it from scratch with a buttery, flaky crust, a tangy cream cheese filling, and tender cinnamon-spiced apples tucked inside. They bake up golden and crisp on the outside, creamy and jammy on the inside, and the vanilla glaze on top seals the deal.
The magic is in the two-part filling. A sweetened cream cheese layer sits under the apples so every bite tastes like apple cheesecake wrapped in pie crust. Store-bought puff pastry or refrigerated pie dough keeps the whole thing weeknight-friendly, but homemade pie crust takes it over the top.
They come together in about 50 minutes with a 15-minute chill and bake, and they freeze beautifully, so you can stash a batch and pop one in the toaster oven whenever the craving hits. Kids lose their minds over them, and adults quietly eat three.
Why You'll Love This Recipe
About the Ingredients
2 sheets (about 1 lb / 450g total) refrigerated puff pastry or pie dough, thawed
Puff pastry gives the shatteriest, most dramatic layers. If you prefer a softer, more classic Pop-Tart texture, use refrigerated pie crust or your favorite homemade all-butter pie dough. Keep it cold until the moment you roll it.
4 oz (113g) full-fat cream cheese, softened
Full-fat is essential; low-fat or whipped cream cheese turns watery and can leak out during baking. Let it sit at room temperature for 30 minutes so it blends smooth without lumps.
3 tbsp (38g) granulated sugar, divided
You can swap in light brown sugar for a deeper caramel note, but reduce it to 2 1/2 tbsp since brown sugar is more moist and sweet.
1 large egg yolk
The yolk enriches the cream cheese layer and helps it set. Save the white for brushing the pastry edges so the tops seal and don't pop open.
1/2 tsp vanilla extract
Pure vanilla rounds out the tangy cream cheese. Vanilla bean paste works 1:1 if you want the little flecks.
2 medium tart apples (about 10 oz / 285g), such as Granny Smith or Honeycrisp, peeled and finely diced
Tart apples hold their shape and balance the sweet glaze. If you only have sweet apples like Fuji, add an extra squeeze of lemon juice to keep the filling from tasting flat.
1 1/2 tsp ground cinnamon
Fresh cinnamon makes a huge difference; if your jar has been open over a year, replace it. A pinch of nutmeg or apple pie spice is a lovely swap for half the cinnamon.
1 tbsp (14g) unsalted butter
Salted butter works too, just skip any added salt. This helps the apples soften and caramelize slightly in the pan.
1 tsp cornstarch
This thickens the apple juices so the filling doesn't run out of the pastry. You can substitute an equal amount of all-purpose flour in a pinch.
1 cup (120g) powdered sugar
Sift it first or your glaze will be lumpy. For a less sweet finish, start with 3/4 cup and add more until you reach a thick drizzle consistency.
2 tbsp whole milk or heavy cream, plus more as needed
Heavy cream makes the glossiest glaze; milk is lighter. Add it one teaspoon at a time so the glaze stays thick enough to set.
1/4 tsp flaky sea salt, for sprinkling (optional)
A little salt on top cuts the sweetness and makes the apple flavor pop. Skip it if you're going for a strictly classic toaster-pastry vibe.
Tips & Tricks
Keep Everything Cold
Warm pastry dough turns greasy and tears. Work quickly, chill the assembled tarts for 15 minutes before baking, and don't over-handle the dough.
Seal the Edges Thoroughly
Press the tines of a fork all the way around the border and poke 3 small vents in the top of each tart. If steam can't escape, the tops blow open and the filling leaks out.
Don't Overfill
Use about 1 tablespoon of cream cheese and 1 tablespoon of apples per tart. Overstuffing is the number one reason homemade Pop-Tarts burst in the oven.
Cool Before Glazing
Wait until the tarts are fully cool to the touch, about 20 minutes, or the glaze slides right off and pools on the rack.
Pro Tips
Step-by-Step Instructions
1. Prep the Oven and Pan
Preheat the oven to 375F (190C) and line two baking sheets with parchment paper. Cold dough on a hot sheet pan bakes unevenly, so let the pan come to temperature and keep the second sheet ready for the second batch.
2. Cook the Apples
Melt the butter in a skillet over medium heat, add the diced apples, 1 tbsp sugar, and the cinnamon, and cook for 5 to 6 minutes until the apples are tender and the edges look glossy, with juices bubbling at the edges of the pan. Stir in the cornstarch and cook 1 minute more until the liquid thickens and coats the apples, then scrape onto a plate and cool completely.
3. Make the Cheesecake Filling
Beat the softened cream cheese, egg yolk, remaining 2 tbsp sugar, and vanilla with a hand mixer for about 60 seconds until completely smooth and no lumps remain. If it looks at all grainy, keep beating; a smooth filling spreads evenly and won't crack.
4. Cut and Fill the Pastry
Roll each pastry sheet into a 10×12-inch rectangle on a lightly floured surface, then cut each into six 3×6-inch rectangles (12 total). Spoon about 1 tbsp cream cheese filling and 1 tbsp cooled apples onto the center of 6 rectangles, leaving a 1/2-inch border clean.
5. Seal the Tarts
Brush the bare borders with the reserved egg white, lay a second rectangle over the top, and press the edges closed with your fingers. Crimp all the way around with a fork, then poke 3 small vents in the top of each tart with a paring knife so steam can escape.
6. Chill the Tarts
Slide the assembled tarts onto the prepared baking sheets and refrigerate for 15 minutes. This firms the butter in the dough so the pastry puffs into distinct, flaky layers instead of melting flat.
7. Bake Until Golden
Bake one sheet at a time for 18 to 22 minutes, until the tarts are deep golden brown at the edges and the filling is visibly bubbling through the vents. If the tops brown too fast, tent loosely with foil for the last 5 minutes.
8. Glaze and Finish
Whisk the powdered sugar, milk, and a pinch of salt until smooth and thick enough to ribbon off the whisk, adding milk a teaspoon at a time if needed. Spread over the cooled tarts, sprinkle with flaky salt if using, and let set for 10 minutes before eating.
Delicious Variations
Caramel Apple Cheesecake
Swirl 1 tbsp salted caramel sauce into the cream cheese layer and drizzle more over the finished glaze.
Cinnamon Roll Style
Skip the apples, spread the cream cheese layer with a cinnamon-sugar swirl, and glaze with a cream cheese icing instead of vanilla.
Berry Cheesecake Swap
Replace the apples with 3/4 cup diced strawberries or raspberries tossed with 1 tsp sugar and no cooking, for a fresher, brighter filling.
How to Store Apple Cheesecake Pop-Tarts
Refrigerator
Store glazed tarts in an airtight container in the refrigerator for up to 4 days. Let them sit at room temperature for 10 minutes before eating so the pastry softens from cold and firm.
Freezer
Freeze baked tarts in a single layer, then transfer to a freezer bag for up to 2 months. You can also freeze assembled unbaked tarts and bake straight from frozen, adding 4 to 5 minutes to the bake time.
Reheating
Reheat in a toaster oven or air fryer at 350F (175C) for 4 to 5 minutes until the pastry re-crisps and the filling is warm. Avoid the microwave, which makes the crust soggy.
Frequently Asked Questions
Q: Can I use store-bought pie crust instead of puff pastry?
Yes, refrigerated pie crust works perfectly and gives a softer, more classic Pop-Tart texture. Just roll it slightly thinner than the package directs so the tarts aren't doughy, and bake for 16 to 18 minutes instead of 20.
Q: Why did my Pop-Tarts leak filling in the oven?
Almost always because the edges weren't sealed tightly or the tarts were overfilled. Press the border firmly with a fork, use only about 1 tablespoon of each filling, and always poke vents in the top so steam escapes instead of blowing the seams open.
Q: Can I make these Apple Cheesecake Pop-Tarts ahead of time?
Absolutely. Assemble them up to 24 hours in advance and keep them covered in the refrigerator, or freeze them unbaked for up to 2 months. Bake straight from the fridge or freezer, adding 4 to 5 minutes if frozen.
Q: Do I have to peel the apples?
Peeling gives the silkiest, most cheesecake-like filling, but you can leave the skin on if you dice the apples very small. The skin adds a bit of texture and fiber, so it's a personal preference more than a rule.
Q: How do I keep the glaze from running off?
Let the tarts cool completely before glazing and keep the glaze thick, about the consistency of honey. If it's too thin, whisk in more powdered sugar a tablespoon at a time until it ribbons off the whisk.
Grab your rolling pin and make a batch of these Apple Cheesecake Pop-Tarts this weekend. Once you taste that flaky, creamy, cinnamon-apple combo, the boxed version will never satisfy you again. Bake them, glaze them, and watch them disappear before they even cool.
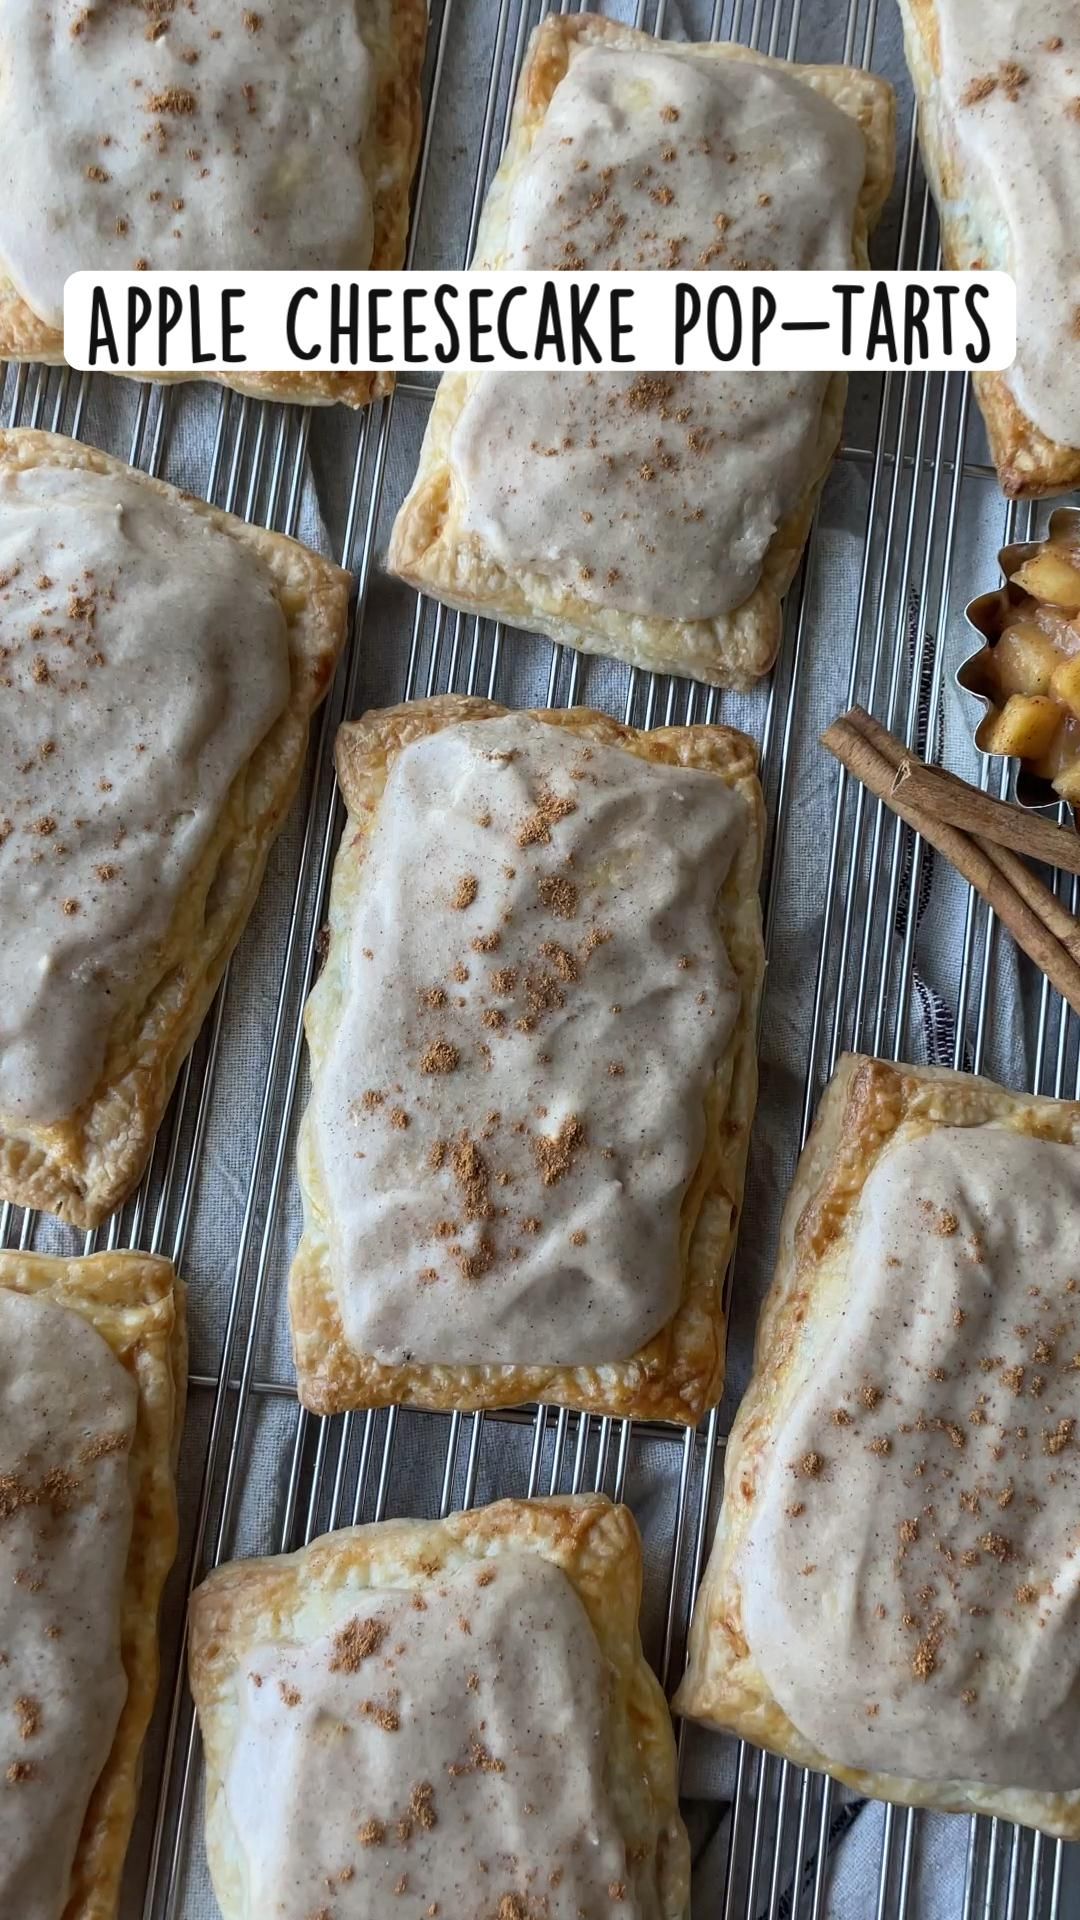
Apple Cheesecake Pop-Tarts
Apple Cheesecake Pop-Tarts pack spiced cinnamon apples and tangy cream cheese filling into flaky golden pastry for a crispy, creamy homemade treat.
🧂 Ingredients
- 2 sheets (about 1 lb / 450g total) refrigerated puff pastry or pie dough, thawed
- 4 oz (113g) full-fat cream cheese, softened
- 3 tbsp (38g) granulated sugar, divided
- 1 large egg yolk
- 1/2 tsp vanilla extract
- 2 medium tart apples (about 10 oz / 285g), such as Granny Smith or Honeycrisp, peeled and finely diced
- 1 1/2 tsp ground cinnamon
- 1 tbsp (14g) unsalted butter
- 1 tsp cornstarch
- 1 cup (120g) powdered sugar
- 2 tbsp whole milk or heavy cream, plus more as needed
- 1/4 tsp flaky sea salt, for sprinkling (optional)
📋 Instructions
- 1Prep the Oven and Pan — Preheat the oven to 375F (190C) and line two baking sheets with parchment paper. Cold dough on a hot sheet pan bakes unevenly, so let the pan come to temperature and keep the second sheet ready for the second batch.
- 2Cook the Apples — Melt the butter in a skillet over medium heat, add the diced apples, 1 tbsp sugar, and the cinnamon, and cook for 5 to 6 minutes until the apples are tender and the edges look glossy, with juices bubbling at the edges of the pan. Stir in the cornstarch and cook 1 minute more until the liquid thickens and coats the apples, then scrape onto a plate and cool completely.
- 3Make the Cheesecake Filling — Beat the softened cream cheese, egg yolk, remaining 2 tbsp sugar, and vanilla with a hand mixer for about 60 seconds until completely smooth and no lumps remain. If it looks at all grainy, keep beating; a smooth filling spreads evenly and won't crack.
- 4Cut and Fill the Pastry — Roll each pastry sheet into a 10×12-inch rectangle on a lightly floured surface, then cut each into six 3×6-inch rectangles (12 total). Spoon about 1 tbsp cream cheese filling and 1 tbsp cooled apples onto the center of 6 rectangles, leaving a 1/2-inch border clean.
- 5Seal the Tarts — Brush the bare borders with the reserved egg white, lay a second rectangle over the top, and press the edges closed with your fingers. Crimp all the way around with a fork, then poke 3 small vents in the top of each tart with a paring knife so steam can escape.
- 6Chill the Tarts — Slide the assembled tarts onto the prepared baking sheets and refrigerate for 15 minutes. This firms the butter in the dough so the pastry puffs into distinct, flaky layers instead of melting flat.
- 7Bake Until Golden — Bake one sheet at a time for 18 to 22 minutes, until the tarts are deep golden brown at the edges and the filling is visibly bubbling through the vents. If the tops brown too fast, tent loosely with foil for the last 5 minutes.
- 8Glaze and Finish — Whisk the powdered sugar, milk, and a pinch of salt until smooth and thick enough to ribbon off the whisk, adding milk a teaspoon at a time if needed. Spread over the cooled tarts, sprinkle with flaky salt if using, and let set for 10 minutes before eating.