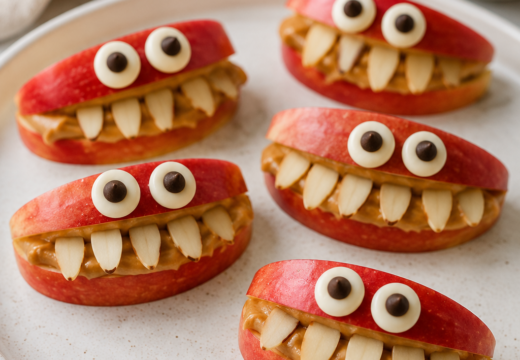

Four marshmallows with chocolate eyes on them earn a spot in the weekly rotation because they take almost no effort and make everyone smile. You toast four fat marshmallows until they puff and turn golden, then dot each one with two chocolate chips so they look right back at you.
I started making these for my niece's class party and now the kids ask for them on ordinary Tuesdays. There is no mixer, no thermometer, and no specialty pan, just a sheet of parchment and a few minutes under the broiler.
The trick is watching them closely, because a marshmallow goes from perfectly toasted to charcoal in about twenty seconds. Stay at the oven door and you will have glossy, gooey little faces every single time.
Why You'll Love This Recipe
About the Ingredients
12 large marshmallows (about 4 ounces or 115g total)
Fresh, soft marshmallows toast best, so squeeze the bag before buying and skip any that feel stiff or stale. If you only have mini marshmallows, pile four of them together per treat and reduce the broiler time by half.
24 semisweet chocolate chips (about 1 tablespoon)
Semisweet holds its shape better than milk chocolate under heat; mini chips work beautifully, and raisins or dried cranberries are an easy swap if you want no chocolate at all.
1 teaspoon neutral oil, for brushing (optional)
A light brush of oil helps the marshmallows release cleanly from the parchment; cooking spray works just as well, and you can skip it entirely on a silicone mat.
1 tablespoon crushed graham crackers or cookie crumbs (optional)
Sprinkling crumbs on the warm marshmallow bottoms adds a s'mores-style crunch; crushed pretzels or toasted coconut are great substitutes and both add a nice salty edge.
Tips & Tricks
Do not walk away from the broiler
Marshmallows brown in seconds, so stand at the oven with the light on and the door cracked open.
Use room-temperature marshmallows
Cold or firm marshmallows puff unevenly, so let them sit on the counter for ten minutes before toasting.
Line the pan properly
Parchment or a silicone mat keeps the sticky bottoms intact, and cleanup takes ten seconds instead of ten minutes.
- Press the eyes on while the marshmallows are still warm: The chocolate grips the surface as it softens, and it will slide right off a cooled marshmallow.
Pro Tips
Step-by-Step Instructions
1. Heat the broiler
Set an oven rack about 6 inches from the heating element and turn the broiler to high, which is roughly 500°F (260°C) on most home ovens. Let it heat for 5 minutes so the element glows evenly.
2. Line the pan
Line a small baking sheet with parchment paper or a silicone mat and brush it lightly with the neutral oil if you like. This keeps the sticky bottoms from tearing when you lift them.
3. Arrange the marshmallows
Place the marshmallows on the sheet flat-side down, spaced about 2 inches apart so they have room to puff. You want four per batch for easy handling.
4. Broil until golden
Slide the pan under the broiler and toast for 45 to 90 seconds, watching constantly. They are done when the tops turn golden brown and the sides look glossy and begin to slump, and they should feel soft and pillowy if you touch one with a fingertip.
5. Add the chocolate eyes
Pull the pan out and immediately press two chocolate chips into the top of each marshmallow, pointed ends up, about half an inch apart. The residual heat softens the chocolate just enough to anchor it.
6. Let them set
Leave the marshmallows on the pan for 3 to 4 minutes so the chocolate firms up and the marshmallows hold their shape. If you added crumbs, sprinkle them over the warm bottoms now.
7. Lift and serve
Slide a small spatula under each marshmallow and transfer to a plate. Serve within an hour while the centers are still soft and gooey.
Delicious Variations
S'mores Style
Dip the warm bottoms in crushed graham crackers and press a square of milk chocolate on top before the eyes go on.
Snowman Batch
Stack two marshmallows for each treat, add the chocolate eyes to the top one and a tiny sliver of carrot for a nose.
Dark Chocolate Eyes
Use dark chocolate chunks instead of chips for a deeper, less sweet bite that adults tend to prefer.
How to Store Four Marshmallows with Chocolate Eyes on Them
Refrigerator
Store in an airtight container at room temperature for up to 2 days; refrigeration makes marshmallows gummy, so only chill them if your kitchen is very warm, and let them sit out 15 minutes before serving.
Freezer
Freezing is not recommended because the marshmallows weep and turn sticky when thawed, though you can freeze the plain untoasted marshmallows straight from the bag for months.
Reheating
Refresh in a 350°F (175°C) oven for 3 to 4 minutes, or microwave in 10-second bursts, until soft again; the chocolate eyes will soften but hold their place.
Frequently Asked Questions
Q: How do you make chocolate eyes stick to marshmallows?
Press the chocolate chips into the marshmallows while they are still warm from the oven. The heat softens the chocolate just enough to grip, and it sets firm again as it cools. If your marshmallows have cooled, microwave the chips for 5 seconds first.
Q: Can I make four marshmallows with chocolate eyes in the microwave?
Yes, microwave them on a parchment-lined plate in 10-second bursts until they puff, usually 20 to 30 seconds total. Add the eyes right away, since microwaved marshmallows deflate quickly and lose their shape within a minute.
Q: Why did my marshmallows turn hard instead of gooey?
They were probably toasted too long or left under the broiler after they had already puffed. Pull them the moment the tops turn golden, which is usually under 90 seconds, and serve them within an hour for the softest centers.
Q: What kind of chocolate works best for the eyes?
Semisweet or dark chocolate chips hold their shape best under the broiler. Milk chocolate and chocolate chunks melt faster, so chill them in the fridge for 10 minutes before pressing them in.
Q: Are these marshmallow treats gluten free?
Yes, plain marshmallows and chocolate chips are gluten free, so the basic version is safe for most gluten-free diets. Check the labels and skip the optional graham cracker crumbs if you are avoiding gluten.
Make a batch this afternoon and watch how fast four little marshmallows disappear. Snap a photo before they vanish, then tell me which variation your family liked best. Cook it your way, and tell me how it went.

Four Marshmallows with Chocolate Eyes on Them
Four marshmallows with chocolate eyes on them turn into adorable little treats in 15 minutes, perfect for parties, lunchboxes and last-minute fun.
🧂 Ingredients
- 12 large marshmallows (about 4 ounces or 115g total)
- 24 semisweet chocolate chips (about 1 tablespoon)
- 1 teaspoon neutral oil, for brushing (optional)
- 1 tablespoon crushed graham crackers or cookie crumbs (optional)
📋 Instructions
- 1Heat the broiler — Set an oven rack about 6 inches from the heating element and turn the broiler to high, which is roughly 500°F (260°C) on most home ovens. Let it heat for 5 minutes so the element glows evenly.
- 2Line the pan — Line a small baking sheet with parchment paper or a silicone mat and brush it lightly with the neutral oil if you like. This keeps the sticky bottoms from tearing when you lift them.
- 3Arrange the marshmallows — Place the marshmallows on the sheet flat-side down, spaced about 2 inches apart so they have room to puff. You want four per batch for easy handling.
- 4Broil until golden — Slide the pan under the broiler and toast for 45 to 90 seconds, watching constantly. They are done when the tops turn golden brown and the sides look glossy and begin to slump, and they should feel soft and pillowy if you touch one with a fingertip.
- 5Add the chocolate eyes — Pull the pan out and immediately press two chocolate chips into the top of each marshmallow, pointed ends up, about half an inch apart. The residual heat softens the chocolate just enough to anchor it.
- 6Let them set — Leave the marshmallows on the pan for 3 to 4 minutes so the chocolate firms up and the marshmallows hold their shape. If you added crumbs, sprinkle them over the warm bottoms now.
- 7Lift and serve — Slide a small spatula under each marshmallow and transfer to a plate. Serve within an hour while the centers are still soft and gooey.

Mireille writes about weeknight cooking built around what is already in the pantry, with a focus on Haitian and Caribbean home dishes made simpler for busy kitchens. She favors short ingredient lists, honest substitutions, and recipes that forgive a missed step. Her angle is feeding a household well without a second trip to the store.