

This collection is built around one rule: every Halloween item must be a real recipe, not a craft. The anchor is the Mummy Veggie Wrap, a 15-minute assembly of whole-wheat tortilla, hummus, grated carrot and cucumber strips that looks like bandages and eats like lunch.
Weigh the fillings rather than eyeballing them. A 60 g portion of grated carrot per wrap keeps the roll tight, and tight rolls slice cleanly into mummy bands. Loose fillings tear the tortilla and ruin the look.
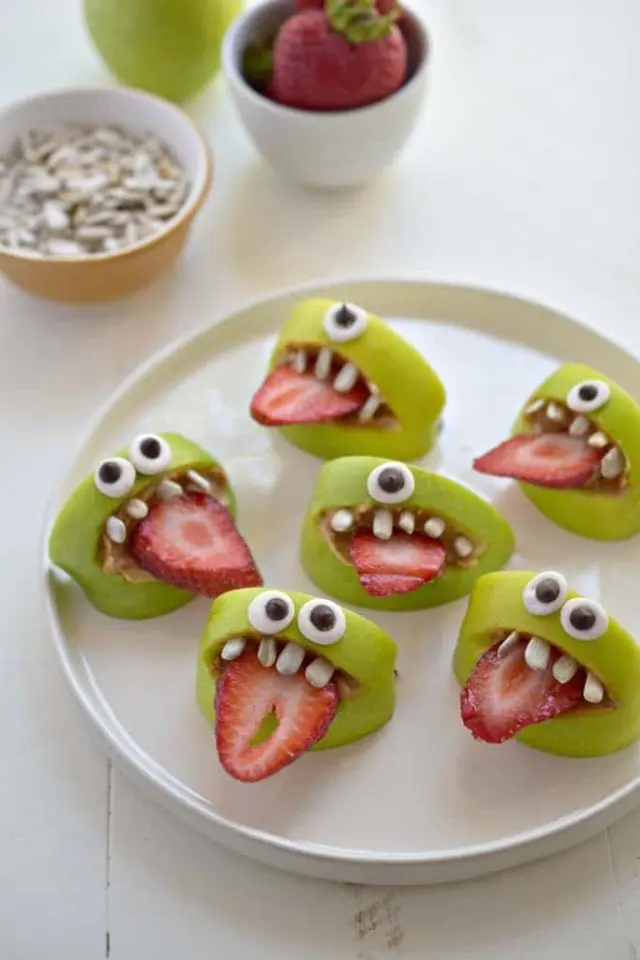
The remaining sixteen ideas follow the same logic: two eyes, one bandage, real ingredients. Banana ghosts, clementine pumpkins, yogurt spider cups and apple monster mouths all use the same visual trick with fruit and dairy instead of sugar.
Why You'll Love This Recipe
About the Ingredients
4 large whole-wheat tortillas (about 240 g total)
Use 8-inch tortillas so the roll stays slender. A spinach or beet tortilla adds color if you find them fresh.
200 g hummus, plain or roasted red pepper
Thick hummus spreads without soaking the tortilla. If yours is loose, drain it in a fine sieve for 10 minutes.
120 g carrot, coarsely grated
Grate on the large holes so the strands read as bandages. Pre-shredded carrot works but is drier; spritz it with water.
1 medium cucumber (about 200 g), cut into thin strips
Seed the cucumber first if it is watery. A zucchini strip is a firm substitute with less moisture.
100 g cooked chicken breast or firm tofu, sliced thin
Leftover roast chicken is ideal. Press tofu for 15 minutes and sear it if you want a meat-free version.
2 slices mild cheese (about 40 g), cut into thin strips
Mild cheddar or mozzarella keeps the flavor neutral for picky eaters. Skip it if you need dairy-free.
2 black olives or 2 small nori pieces, for eyes
Black olives give round eyes; nori cuts into sharper shapes. Both stick to hummus without glue.
1 teaspoon olive oil, for sealing
Any neutral oil works. The oil helps the tortilla edge adhere when pressed.
Tips & Tricks
- Warm the tortilla for 10 seconds per side in a dry pan before spreading; a cold tortilla cracks when rolled and the mummy bands split.
- Spread hummus to within 1 cm of the edge only; hummus at the rim squeezes out and makes the wrap slippery.
- Roll firmly but not tightly, then rest the wrap seam-side down for 2 minutes before slicing so the bands hold their shape.
- Slice with a serrated knife in one firm stroke; a sawing motion drags the filling and blurs the bandage look.
Pro Tips
Step-by-Step Instructions
1. Warm the tortillas
Heat a dry skillet over medium heat, 350 F (175 C), and warm each tortilla for 10 seconds per side. The tortilla is ready when it flexes without cracking (warm gluten bends instead of tearing).
2. Spread the hummus
Spread 50 g of hummus over each tortilla, leaving a 1 cm border. A thin, even layer is the goal (thick hummus makes the roll bulky and the bands uneven).
3. Layer the fillings
Arrange 30 g grated carrot, cucumber strips, chicken and cheese in a line along the lower third. Stop when the line is 3 cm thick (an overfilled wrap bursts at the seam).
4. Roll and seal
Fold the near edge over the filling, tuck, and roll away from you. Brush the far edge with olive oil and press (the oil glues the seam shut).
5. Rest the wraps
Set the wraps seam-side down on a board and rest for 2 minutes. The wrap is set when it holds its shape without unrolling (resting lets the hummus bind).
6. Slice into bands
Cut each wrap into 5 diagonal slices with a serrated knife. Cut cleanly through in one stroke (sawing smears the filling and blurs the bandage pattern).
7. Add the eyes
Press two olive or nori pieces onto the top band of each slice. Place them slightly off-center (centered eyes look like a face; offset eyes look like a mummy).
8. Chill before serving
Refrigerate the slices for 10 minutes, then serve. The wrap is ready when the hummus feels firm to the touch (chilling keeps the bands upright on the plate).
Delicious Variations
Turkey and Cranberry Mummies
swap hummus for 40 g cream cheese and use sliced turkey with a thin cranberry smear.
Vegan Garden Mummies
use dairy-free hummus, pressed tofu and extra cucumber; skip the cheese and oil-seal with water.
Breakfast Mummies
spread 40 g peanut butter, add banana strips and a drizzle of honey, then slice the same way.
How to Store 17 Healthy Halloween Recipes Ideas for Kids – Paging Fun Mums
Refrigerator
Store wrapped whole, unsliced, in an airtight container for up to 24 hours. Slice just before serving so the bands stay sharp.
Freezer
Do not freeze assembled wraps; cucumber and hummus release water and the tortilla turns soggy. Freeze the sliced chicken filling alone for up to 2 months.
Reheating
Serve cold. If you must warm them, microwave wrapped in a damp paper towel for 15 seconds only; longer and the cucumber softens.
Frequently Asked Questions
Q: How do you make healthy Halloween snacks for kids?
Build them from real food with a visual trick: two eyes plus a bandage shape. Hummus, vegetables, fruit and yogurt cover almost every classic Halloween character without added sugar.
Q: Can I make these Halloween wraps ahead of time?
Yes, assemble them up to 24 hours ahead and keep them wrapped whole in the fridge. Slice and add the eyes right before serving so the bands and faces stay clean.
Q: What can I use instead of hummus in a mummy wrap?
Cream cheese, mashed avocado or thick Greek yogurt all spread and hold the same way. Choose a thick spread; a watery one soaks the tortilla and the roll collapses.
Q: Are these Halloween recipes safe for a classroom party?
Most are, provided you check nut and dairy allergies first. The fruit and vegetable items are the safest default, and they hold at room temperature for about two hours.
Q: How many mummy wraps does this recipe make?
It makes 4 wraps, which slice into 20 bands and serve 6 as a snack or 4 as a lunch. Double the filling quantities for a class of twenty.
Pick two items from the list, weigh the fillings, and build them tonight. The mummy wrap is the place to start because it teaches the roll-and-rest method every other item borrows. Weigh, watch, repeat.
17 Healthy Halloween Recipes Ideas for Kids – Paging Fun Mums
17 Healthy Halloween Recipes for Kids turns spooky snacks into real food: veggie-loaded mummy wraps, fruit monsters and yogurt ghosts kids actually eat.
🧂 Ingredients
- 4 large whole-wheat tortillas (about 240 g total)
- 200 g hummus, plain or roasted red pepper
- 120 g carrot, coarsely grated
- 1 medium cucumber (about 200 g), cut into thin strips
- 100 g cooked chicken breast or firm tofu, sliced thin
- 2 slices mild cheese (about 40 g), cut into thin strips
- 2 black olives or 2 small nori pieces, for eyes
- 1 teaspoon olive oil, for sealing
📋 Instructions
- 1Warm the tortillas — Heat a dry skillet over medium heat, 350 F (175 C), and warm each tortilla for 10 seconds per side. The tortilla is ready when it flexes without cracking (warm gluten bends instead of tearing).
- 2Spread the hummus — Spread 50 g of hummus over each tortilla, leaving a 1 cm border. A thin, even layer is the goal (thick hummus makes the roll bulky and the bands uneven).
- 3Layer the fillings — Arrange 30 g grated carrot, cucumber strips, chicken and cheese in a line along the lower third. Stop when the line is 3 cm thick (an overfilled wrap bursts at the seam).
- 4Roll and seal — Fold the near edge over the filling, tuck, and roll away from you. Brush the far edge with olive oil and press (the oil glues the seam shut).
- 5Rest the wraps — Set the wraps seam-side down on a board and rest for 2 minutes. The wrap is set when it holds its shape without unrolling (resting lets the hummus bind).
- 6Slice into bands — Cut each wrap into 5 diagonal slices with a serrated knife. Cut cleanly through in one stroke (sawing smears the filling and blurs the bandage pattern).
- 7Add the eyes — Press two olive or nori pieces onto the top band of each slice. Place them slightly off-center (centered eyes look like a face; offset eyes look like a mummy).
- 8Chill before serving — Refrigerate the slices for 10 minutes, then serve. The wrap is ready when the hummus feels firm to the touch (chilling keeps the bands upright on the plate).

Tomasz writes precise, method-first recipes for breads, ferments, and slow braises, drawing on Polish and Central European home cooking. He cares about weights, temperatures, and timing, and explains the reason behind each step so cooks can repeat results. His angle is turning fussy techniques into clear, checkable instructions.