All Recipes Menu
Homemade Pop Tarts Recipe – Crispy Golden Pastries
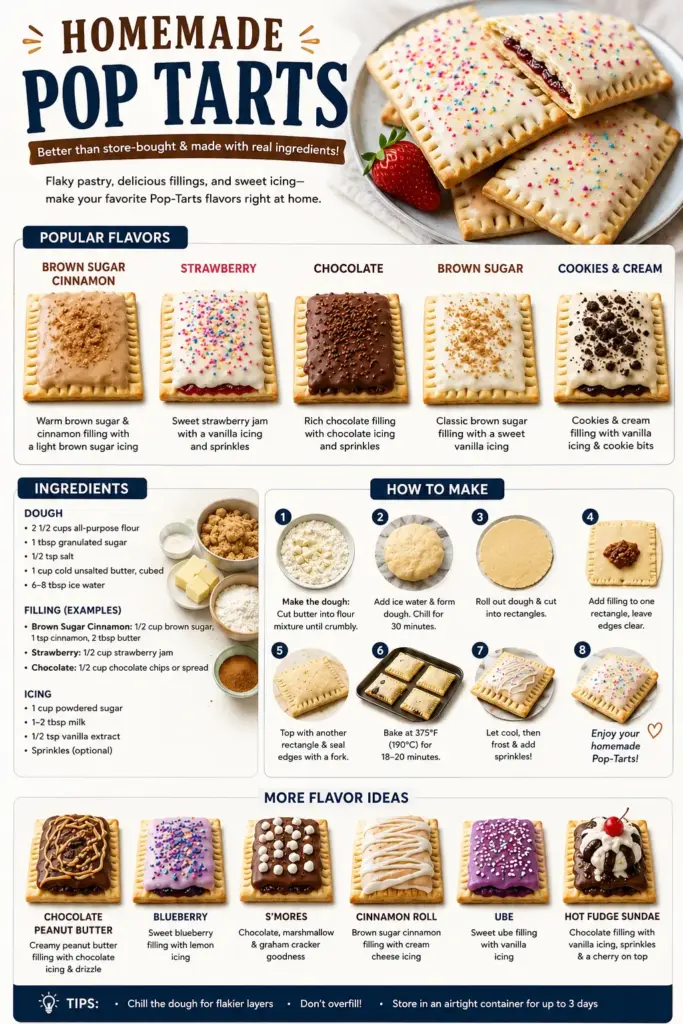
The toaster clicks down, and within seconds the kitchen smells like butter browning and warm strawberry jam. That smell is the whole reason I started making homemade Pop Tarts instead of buying them.
You get a tender, almost pie-crust pastry that shatters when you bite it, a jam center that bubbles at the edges, and a thin vanilla glaze that cracks under your teeth. Store-bought versions can't do any of that.
The dough comes together in one bowl, chills while your oven heats, and bakes on a single sheet pan. Make a double batch, because these disappear faster than you'd expect. Taste as you go, then taste again.
Why You'll Love This Recipe
About the Ingredients
2 1/2 cups (313g) all-purpose flour, plus extra for rolling
Spoon the flour into your measuring cup and level it off, or the dough turns dry and crumbly. Swap in bread flour for an even chewier crust.
1 cup (227g) cold unsalted butter, cubed
Keep the butter in the fridge until the last second so it stays cold and creates steam pockets. Salted butter works too, just skip the added salt.
1/2 cup (100g) granulated sugar
This sweetens the crust and helps it brown evenly. Cane sugar or coconut sugar can replace it one-for-one.
1 large egg, plus 1 egg beaten with 1 tablespoon water for the wash
The egg wash is what makes the pastry shine and seals the edges. A flax egg works if you need it egg-free, though the crust will be slightly softer.
1 teaspoon vanilla extract
Use real vanilla, not imitation, because you taste it clearly in the glaze. Almond extract swapped in at half the amount gives a lovely bakery flavor.
1/2 teaspoon fine sea salt
Salt keeps the sweetness from tasting flat. Kosher salt is fine, but use a slightly heaping half teaspoon.
3/4 cup (240g) strawberry or raspberry jam
Choose a thick, seedless jam so it doesn't leak out during baking. If yours is runny, simmer it for 5 minutes to reduce it before using.
1 cup (120g) powdered sugar
Sift it first or the glaze turns lumpy. For a tangier finish, replace 1 tablespoon of water with lemon juice.
2 to 3 tablespoons whole milk, for the glaze
Add it one tablespoon at a time until the glaze ribbons off the spoon. Oat milk works fine as a substitute.
1/4 teaspoon flaky sea salt, for finishing
A pinch on top cuts the sweetness and looks bakery-worthy. Skip it if you only have table salt, since it dissolves.
Tips & Tricks
Keep Everything Cold
Chill the dough for at least 30 minutes before rolling, or the butter melts and the tarts turn tough instead of flaky.
Seal the Edges Hard
Press the tines of a fork firmly around all four sides, then prick the top twice so steam escapes and the tarts don't puff into pillows.
Don't Overfill
Use only 1 tablespoon of jam per tart, because more than that bubbles out, burns on the pan, and leaves you with a sticky mess.
Watch the Last Two Minutes
The difference between golden and burnt is short, so stay near the oven once the edges start browning.
Pro Tips
Step-by-Step Instructions
1. Whisk the dry ingredients
Whisk the flour, granulated sugar, and sea salt in a large bowl until no lumps remain. This spreads the salt evenly so no bite tastes flat.
2. Cut in the cold butter
Toss in the cubed cold butter and work it with your fingertips or a pastry cutter until the mixture looks like coarse sand with a few pea-sized pieces left. Those butter bits are your flaky layers.
3. Bring the dough together
Add the egg and vanilla, then stir with a fork until a shaggy dough forms, adding a teaspoon of cold water only if it won't hold. Squeeze a handful; if it stays together, you're done.
4. Chill the dough
Shape the dough into two flat discs, wrap them, and refrigerate for 30 minutes until firm but still pliable. Cold dough rolls without sticking or tearing.
5. Roll and fill
Preheat the oven to 375°F (190°C). Roll each disc on floured parchment to 1/8 inch thick, cut into 4-by-3-inch rectangles, and spoon 1 tablespoon of jam onto half of them, leaving a half-inch border.
6. Seal and crimp
Top each filled rectangle with a second one, press the edges closed, and crimp with a fork. Brush with egg wash and prick the tops twice with a knife so steam can escape.
7. Bake until golden
Bake on a parchment-lined sheet at 375°F (190°C) for 20 to 24 minutes, until the edges are deep golden brown and the jam bubbles at the seams. Listen for a faint sizzle when you open the oven; that's your cue they're done.
8. Cool and glaze
Cool the tarts on the pan for 10 minutes, then whisk the powdered sugar and milk into a thick glaze and spread it over the barely warm pastries. Finish with flaky salt and let the glaze set for 15 minutes before eating.
Delicious Variations
Brown Sugar Cinnamon
Swap the jam for a paste of 1/2 cup brown sugar, 1 tablespoon flour, and 1 teaspoon cinnamon.
Chocolate Hazelnut
Spread 1 tablespoon chocolate hazelnut spread in each tart and skip the glaze in favor of a dusting of cocoa.
Blueberry Lemon
Use thick blueberry preserves and add 1 teaspoon lemon zest to the glaze for a bright, summery version.
How to Store Homemade Pop Tarts Recipe
Refrigerator
Store glazed tarts in an airtight container in the fridge for up to 5 days; let them sit at room temperature for 10 minutes before eating.
Freezer
Freeze unbaked, sealed tarts on a sheet pan, then transfer to a bag for up to 2 months and bake from frozen at 375°F (190°C) for 22 to 26 minutes.
Reheating
Reheat in a toaster on a low setting or in a 300°F (150°C) oven for 5 minutes, until the crust crisps and the filling is warm.
Frequently Asked Questions
Q: Can I use store-bought pie crust for homemade Pop Tarts?
Yes, refrigerated pie crust works as a shortcut and cuts the prep to about 15 minutes. Roll it slightly thinner, fill, seal, and bake at 375°F (190°C) for 18 to 22 minutes, until golden.
Q: Why did my Pop Tarts leak filling in the oven?
The edges weren't sealed tightly or the tarts were overfilled. Use just 1 tablespoon of thick jam, press the seams firmly, and crimp with a fork before baking.
Q: How do I keep homemade Pop Tarts from getting soggy?
Let them cool completely before glazing and storing, and never seal them in a container while warm. A fully cooled crust stays crisp for days in the fridge.
Q: Can I make homemade Pop Tarts ahead of time?
Absolutely, and they freeze beautifully. Assemble the tarts, freeze them unbaked on a sheet pan, then bag them and bake straight from frozen whenever a craving hits.
Q: What is the best jam for Pop Tarts?
Thick, seedless preserves like strawberry, raspberry, or apricot work best because they hold their shape and don't bleed through the seams. Avoid thin jellies or runny homemade jam unless you reduce it first.
Grab your rolling pin and make a batch this weekend, then tell me which filling you tried. These homemade Pop Tarts are the kind of breakfast that makes a Tuesday feel like a snow day. Taste as you go, then taste again.
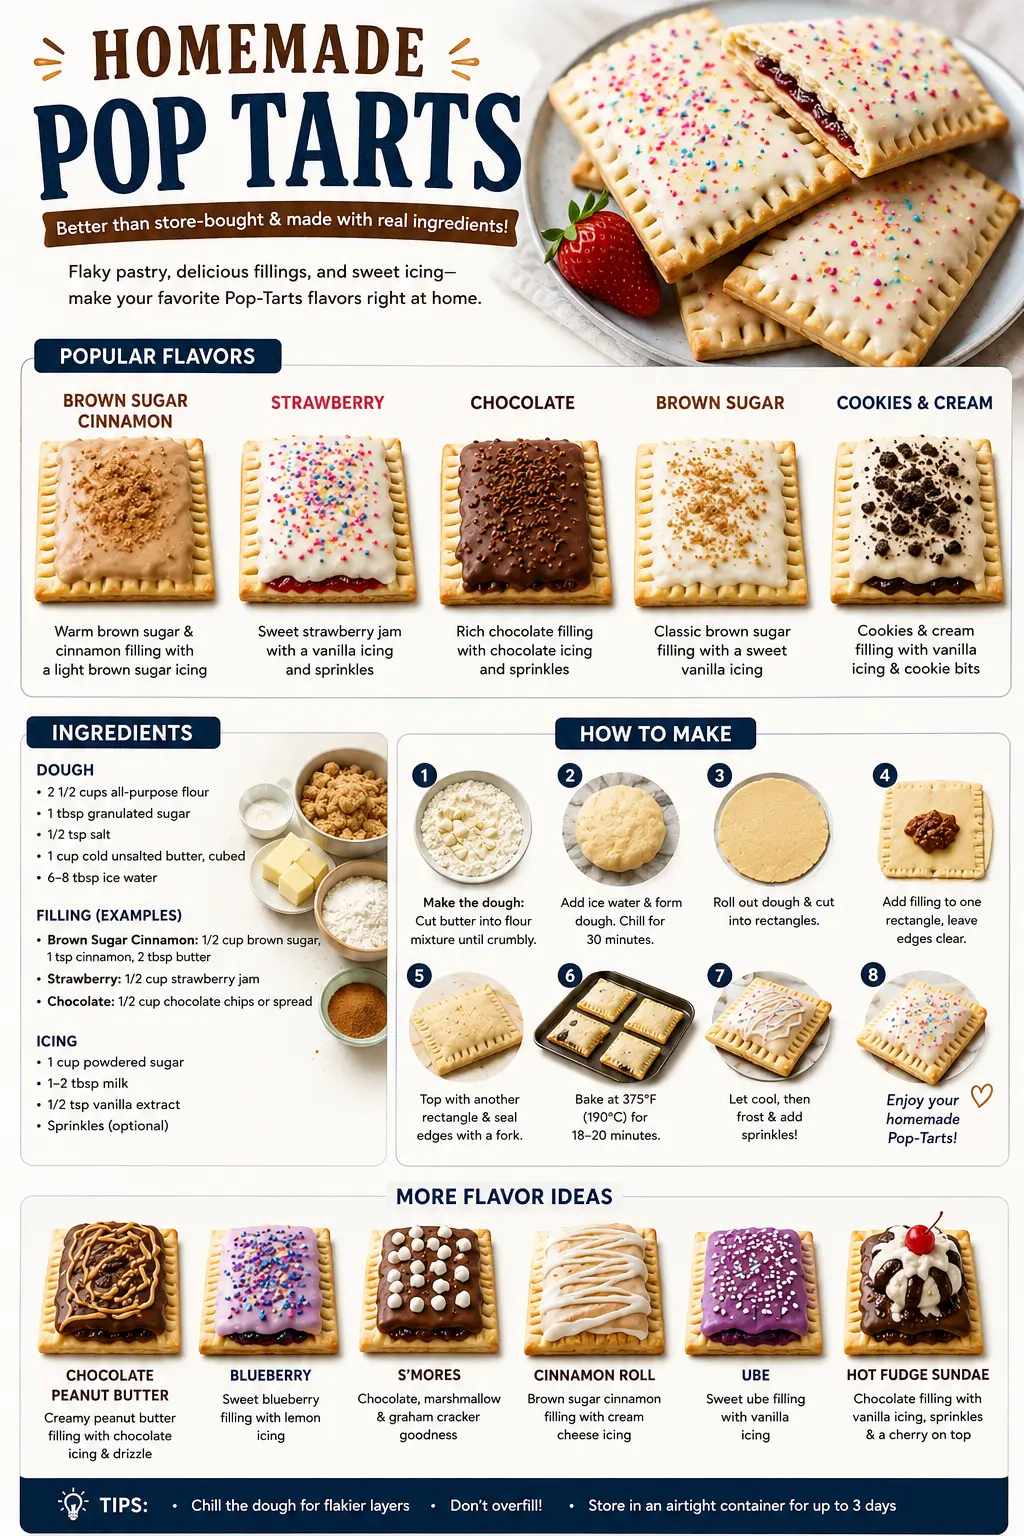
Homemade Pop Tarts Recipe
This homemade Pop Tarts recipe bakes flaky brown-sugar pastries with jam filling and vanilla glaze, ready in 50 minutes for a nostalgic breakfast.
🧂 Ingredients
- 2 1/2 cups (313g) all-purpose flour, plus extra for rolling
- 1 cup (227g) cold unsalted butter, cubed
- 1/2 cup (100g) granulated sugar
- 1 large egg, plus 1 egg beaten with 1 tablespoon water for the wash
- 1 teaspoon vanilla extract
- 1/2 teaspoon fine sea salt
- 3/4 cup (240g) strawberry or raspberry jam
- 1 cup (120g) powdered sugar
- 2 to 3 tablespoons whole milk, for the glaze
- 1/4 teaspoon flaky sea salt, for finishing
📋 Instructions
- 1Whisk the dry ingredients — Whisk the flour, granulated sugar, and sea salt in a large bowl until no lumps remain. This spreads the salt evenly so no bite tastes flat.
- 2Cut in the cold butter — Toss in the cubed cold butter and work it with your fingertips or a pastry cutter until the mixture looks like coarse sand with a few pea-sized pieces left. Those butter bits are your flaky layers.
- 3Bring the dough together — Add the egg and vanilla, then stir with a fork until a shaggy dough forms, adding a teaspoon of cold water only if it won't hold. Squeeze a handful; if it stays together, you're done.
- 4Chill the dough — Shape the dough into two flat discs, wrap them, and refrigerate for 30 minutes until firm but still pliable. Cold dough rolls without sticking or tearing.
- 5Roll and fill — Preheat the oven to 375°F (190°C). Roll each disc on floured parchment to 1/8 inch thick, cut into 4-by-3-inch rectangles, and spoon 1 tablespoon of jam onto half of them, leaving a half-inch border.
- 6Seal and crimp — Top each filled rectangle with a second one, press the edges closed, and crimp with a fork. Brush with egg wash and prick the tops twice with a knife so steam can escape.
- 7Bake until golden — Bake on a parchment-lined sheet at 375°F (190°C) for 20 to 24 minutes, until the edges are deep golden brown and the jam bubbles at the seams. Listen for a faint sizzle when you open the oven; that's your cue they're done.
- 8Cool and glaze — Cool the tarts on the pan for 10 minutes, then whisk the powdered sugar and milk into a thick glaze and spread it over the barely warm pastries. Finish with flaky salt and let the glaze set for 15 minutes before eating.

Priya writes about South Indian home cooking and the improvisation that happens in real kitchens, from quick weekday tiffins to slow weekend spreads. She is interested in how a single tempering of spices changes a dish and in adapting familiar recipes to what a cook has on hand. Her angle is playful, sensory recipe writing that treats cooking as something to tinker with.