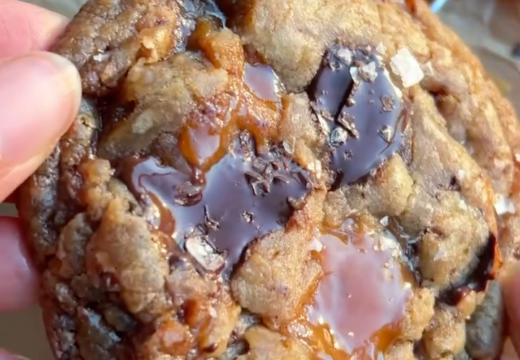
Pinterest Image Cookies are the edible version of a scroll-stopping pin: bright, layered, and almost too pretty to eat. They bake up with crisp golden edges and a tender vanilla center, so every bite delivers that classic butter-cookie snap without crumbling apart.
The secret is a simple two-tone dough that gets layered, chilled, and sliced into neat rainbow rounds. No piping bags, no royal icing, and no food coloring gels required beyond a few drops of liquid color. If you can make a basic drop cookie, you can make these.
They are perfect for bake sales, birthday trays, holiday cookie boxes, and yes, for photographing on a white marble board. The dough holds its shape beautifully, which means your cookies look exactly as good on the plate as they do in the picture.
Why You'll Love This Recipe
About the Ingredients
2 3/4 cups (345g) all-purpose flour
Spoon the flour into the cup and level it off, or the dough will turn out dry and crumbly. For a gluten-free version, swap in a 1:1 gluten-free baking blend and add 1 extra tablespoon of milk.
1 teaspoon baking powder
Check the date on your baking powder before you start, since expired powder gives flat, dense cookies. You can substitute 1/4 teaspoon baking soda plus 1/2 teaspoon cream of tartar.
1/2 teaspoon fine sea salt
Fine sea salt dissolves evenly into the dough; if you only have kosher salt, use 3/4 teaspoon. Do not skip it, because salt is what keeps the vanilla flavor from tasting one-note.
1 cup (2 sticks / 227g) unsalted butter, softened
Let the butter sit at room temperature for 45 minutes until it dents easily with a finger. Salted butter works too, but then reduce the added salt to 1/4 teaspoon.
1 1/4 cups (250g) granulated sugar
White sugar gives the crisp edge; swapping in brown sugar will make the cookies softer and darker. Buy fresh sugar and store it in an airtight jar so it does not harden.
1 large egg plus 1 egg yolk, room temperature
The extra yolk adds richness and chew, while the white alone would make the dough too thin. If you forget to set them out, submerge the eggs in warm tap water for 5 minutes.
2 teaspoons pure vanilla extract
Use real vanilla extract, not imitation, because the flavor is the star of a simple butter cookie. Almond extract makes a lovely swap at 1 teaspoon vanilla plus 1 teaspoon almond.
4 to 6 drops gel or liquid food coloring (red, yellow, blue, green)
Gel coloring gives the most saturated stripes without thinning the dough. If you only have liquid drops, add them one at a time so the dough does not become sticky.
Tips & Tricks
- Chill the dough logs for at least 2 hours before slicing, or the stripes will smear and the rounds will spread in the oven.
- Roll each colored dough portion to the same thickness, about 1/4 inch, so the layers bake evenly and stay level.
- Use a sharp, thin-bladed knife and wipe it clean between slices to keep the color bands crisp instead of muddy.
- Bake on a light-colored aluminum baking sheet lined with parchment; dark nonstick pans brown the bottoms too fast.
Pro Tips
Step-by-Step Instructions
1. Cream Butter and Sugar
Beat the softened butter and granulated sugar in a large bowl with an electric mixer on medium speed for 2 to 3 minutes, until pale and fluffy, then scrape down the bowl. This step traps air that makes the cookies tender instead of tough.
2. Add Egg and Vanilla
Beat in the egg, egg yolk, and vanilla extract one at a time on low speed until fully combined, about 30 seconds, scraping the bowl once. The mixture should look glossy and smooth, not curdled.
3. Mix Dry Ingredients
Whisk the flour, baking powder, and sea salt together in a separate bowl for 20 seconds so the leavening is evenly distributed. Add the dry mix to the wet mix in two additions on low speed, stopping as soon as the flour disappears.
4. Divide and Color
Divide the dough into 3 equal portions, about 1 cup each, and place them in separate bowls. Add 2 to 3 drops of a different food coloring to each bowl and knead with a spatula until the color is uniform, about 1 minute per bowl.
5. Layer the Dough
Roll each colored portion between two sheets of parchment into a 9×6-inch rectangle about 1/4 inch thick. Stack the three rectangles on top of one another, press gently to seal, and trim the edges straight with a bench scraper.
6. Chill the Log
Roll the stacked dough into a tight log from the long side, wrap it in plastic wrap, and chill in the refrigerator for at least 2 hours or up to 3 days. Cold dough is the difference between clean stripes and a blurry swirl.
7. Slice and Arrange
Preheat the oven to 350 F (175 C) and line two baking sheets with parchment paper. Slice the chilled log into 1/4-inch rounds with a sharp knife and space them 2 inches apart on the prepared sheets.
8. Bake Until Golden
Bake one sheet at a time for 10 to 12 minutes, until the edges are light golden brown and the centers look set but still soft, and the internal temperature of a cookie reads about 190 F (88 C). Cool on the pan for 5 minutes, then transfer to a wire rack.
Delicious Variations
Citrus Burst
Add 1 tablespoon orange zest and 1 teaspoon lemon extract to the dough for a bright, summery spin.
Chocolate Layered
Replace 1/4 cup of the flour with cocoa powder in one dough portion for a chocolate-vanilla-neapolitan look.
Sprinkle Edge
Roll the chilled log in 1/3 cup rainbow nonpareils before slicing so every cookie has a crunchy, photo-ready border.
How to Store Pinterest Image
Refrigerator
Store baked cookies in an airtight container at room temperature for up to 5 days, or refrigerate for up to 2 weeks. The unbaked dough log keeps in the fridge for up to 3 days.
Freezer
Wrap the unbaked dough log tightly in plastic wrap and foil, then freeze for up to 3 months. Baked cookies freeze in a zip-top bag for up to 2 months.
Reheating
Refresh stored cookies in a 300 F (150 C) oven for 3 to 4 minutes to bring back the crisp edge. Frozen dough slices can go straight into the oven with 1 to 2 extra minutes of bake time.
Frequently Asked Questions
Q: Why did my layered cookies spread in the oven?
The dough was too warm or the butter was too soft when it went in. Chill the log for a full 2 hours and keep the second baking sheet in the refrigerator while the first batch bakes.
Q: Can I make Pinterest Image Cookies without food coloring?
Yes, you can use natural colorants like beet powder, matcha, and turmeric instead of drops. Use 1 to 2 teaspoons of powder per dough portion and add a teaspoon of milk if the dough feels dry.
Q: How do I keep the colored stripes from bleeding together?
Press the stacked layers together firmly and chill the log thoroughly before slicing. A sharp, clean knife and a quick wipe between cuts also stop the colors from smearing.
Q: Can I freeze the dough and bake later?
Absolutely, and the dough actually slices more cleanly after freezing. Wrap the log tightly, freeze for up to 3 months, and bake the slices from frozen with 1 to 2 extra minutes.
Q: What is the best way to tell when the cookies are done?
Look for light golden edges and a set, barely soft center, which takes about 10 to 12 minutes at 350 F (175 C). They will firm up as they cool on the hot pan, so pull them while the middle still looks slightly underdone.
Bake a batch of Pinterest Image Cookies this weekend, snap that overhead shot on the cooling rack, and watch them disappear before you finish editing the photo. Pin the recipe, tag your colorful creations, and save a few slices of dough in the freezer for the next craving.

Pinterest Image
Pinterest Image Cookies are colorful, buttery rainbow cookies with a soft center and crisp edges that look stunning in photos and taste even better.
🧂 Ingredients
- 2 3/4 cups (345g) all-purpose flour
- 1 teaspoon baking powder
- 1/2 teaspoon fine sea salt
- 1 cup (2 sticks / 227g) unsalted butter, softened
- 1 1/4 cups (250g) granulated sugar
- 1 large egg plus 1 egg yolk, room temperature
- 2 teaspoons pure vanilla extract
- 4 to 6 drops gel or liquid food coloring (red, yellow, blue, green)
📋 Instructions
- 1Cream Butter and Sugar — Beat the softened butter and granulated sugar in a large bowl with an electric mixer on medium speed for 2 to 3 minutes, until pale and fluffy, then scrape down the bowl. This step traps air that makes the cookies tender instead of tough.
- 2Add Egg and Vanilla — Beat in the egg, egg yolk, and vanilla extract one at a time on low speed until fully combined, about 30 seconds, scraping the bowl once. The mixture should look glossy and smooth, not curdled.
- 3Mix Dry Ingredients — Whisk the flour, baking powder, and sea salt together in a separate bowl for 20 seconds so the leavening is evenly distributed. Add the dry mix to the wet mix in two additions on low speed, stopping as soon as the flour disappears.
- 4Divide and Color — Divide the dough into 3 equal portions, about 1 cup each, and place them in separate bowls. Add 2 to 3 drops of a different food coloring to each bowl and knead with a spatula until the color is uniform, about 1 minute per bowl.
- 5Layer the Dough — Roll each colored portion between two sheets of parchment into a 9×6-inch rectangle about 1/4 inch thick. Stack the three rectangles on top of one another, press gently to seal, and trim the edges straight with a bench scraper.
- 6Chill the Log — Roll the stacked dough into a tight log from the long side, wrap it in plastic wrap, and chill in the refrigerator for at least 2 hours or up to 3 days. Cold dough is the difference between clean stripes and a blurry swirl.
- 7Slice and Arrange — Preheat the oven to 350 F (175 C) and line two baking sheets with parchment paper. Slice the chilled log into 1/4-inch rounds with a sharp knife and space them 2 inches apart on the prepared sheets.
- 8Bake Until Golden — Bake one sheet at a time for 10 to 12 minutes, until the edges are light golden brown and the centers look set but still soft, and the internal temperature of a cookie reads about 190 F (88 C). Cool on the pan for 5 minutes, then transfer to a wire rack.