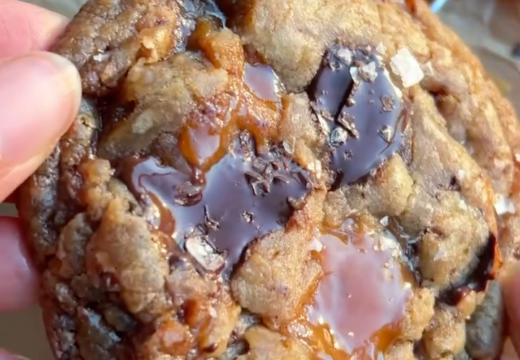
A Pinterest image in this recipe is not a screenshot, it is a hand-decorated vanilla sugar cookie designed to look like a framed photo you can eat. The dough comes together in one bowl, chills while you mix the royal icing, and bakes into crisp-edged, tender-centered rounds that hold sharp lines.
You will build the picture with three simple icing colors, a food-safe marker, and a tiny piping tip. The trick is letting each icing layer dry until it feels firm and matte, so the colors stay crisp instead of bleeding into each other.
These cookies are perfect for birthdays, bake sales, teacher gifts, or anyone who spends too much time saving recipes on Pinterest. They look impressive, but the actual decorating is beginner-friendly and forgiving.
Why You'll Love This Recipe
About the Ingredients
2 1/4 cups (280g) all-purpose flour
Spoon the flour into the measuring cup and level it off, because packed flour makes dry, crumbly dough. For a gluten-free version, substitute a 1:1 gluten-free baking blend and add 1 teaspoon of xanthan gum if the blend does not already contain it.
1 teaspoon baking powder
This gives the cookies a slight lift so they stay tender instead of flat and hard. Check the date on your can, because baking powder loses strength after about 6 months and will not lift the dough properly.
1 tablespoon cornstarch
Cornstarch softens the crumb and keeps the cookies from spreading too thin. If you do not have cornstarch, substitute an equal amount of tapioca starch or arrowroot powder.
1/2 teaspoon fine sea salt
Salt balances the sweetness and keeps the vanilla flavor from tasting flat. If you only have kosher salt, use 3/4 teaspoon because the crystals are larger and less dense.
3/4 cup (170g) unsalted butter, melted and slightly cooled
Melted butter makes the dough easy to stir by hand and gives a rich, buttery flavor. For a dairy-free version, substitute 3/4 cup of melted refined coconut oil or plant-based butter.
1 cup (200g) granulated sugar
Granulated sugar dissolves evenly into the warm butter and helps the cookies brown at the edges. Do not swap in honey or maple syrup here, because liquid sweeteners will make the dough too sticky to roll.
2 large eggs, room temperature
Room-temperature eggs blend smoothly into the butter and sugar without seizing. If you forget to set them out, place them in a bowl of warm tap water for 5 minutes before cracking.
2 teaspoons vanilla extract
Use real vanilla extract rather than imitation for a clean, warm flavor that does not taste artificial. For a different twist, substitute 1 teaspoon of almond extract plus 1 teaspoon of vanilla.
3 cups (360g) powdered sugar, sifted
Sifted powdered sugar is the base of the royal icing and prevents lumpy piping. If your sugar is clumpy, pulse it in a food processor for 10 seconds before mixing.
2 large egg whites, pasteurized
Pasteurized egg whites make a safe royal icing that dries hard and glossy. If you prefer not to use egg whites, substitute 4 tablespoons of meringue powder whisked with 6 tablespoons of water.
1/2 teaspoon lemon juice
A small amount of acid keeps the icing bright white and helps it set firm. Bottled lemon juice works fine, or substitute 1/4 teaspoon of cream of tartar.
Gel food coloring in black, pink, and teal
Gel coloring gives deep shades without thinning the icing the way liquid drops do. If you only have liquid coloring, add it 1 drop at a time and stir in extra powdered sugar if the icing loosens.
Tips & Tricks
- Chill the dough for exactly 30 minutes before rolling, because warm dough sticks to the rolling pin and tears when you lift it.
- Roll the dough to a even 1/4 inch (6mm) thickness between two sheets of parchment, which prevents flour streaks and keeps every cookie the same size.
- Let the flooded white icing dry for at least 4 hours, or until it feels completely firm and matte, before piping the photo details on top.
- Dip your cookie cutter in powdered sugar between every cut so the edges stay sharp and the dough releases cleanly.
Pro Tips
Step-by-Step Instructions
1. Whisk Dry Ingredients
Whisk the flour, baking powder, cornstarch, and salt in a medium bowl for 30 seconds, until no lumps remain. This distributes the leavener evenly so every cookie rises the same way.
2. Mix Wet Ingredients
Stir the melted butter and granulated sugar in a large bowl until smooth, then whisk in the eggs and vanilla until glossy and pale, about 1 minute. The mixture should look like thin pancake batter.
3. Form the Dough
Add the dry ingredients to the wet ingredients and stir with a spatula until a soft dough forms, then press it into a flat disk. Wrap the disk in plastic and chill it in the refrigerator for 30 minutes, until firm but still slightly tacky.
4. Roll and Cut
Preheat the oven to 350F (175C) and line two baking sheets with parchment. Roll the chilled dough to 1/4 inch (6mm) thick between parchment sheets, cut 3-inch rounds, and place them 1 inch apart on the trays.
5. Bake the Cookies
Bake one tray at a time for 10 to 12 minutes, until the edges are light golden brown and the centers look set but soft. The cookies should smell buttery and feel slightly firm at the edge when you touch them.
6. Cool Completely
Slide the parchment onto a wire rack and let the cookies cool for 20 minutes, until they are completely room temperature. Warm cookies will melt the icing and make the colors bleed.
7. Make Royal Icing
Beat the powdered sugar, egg whites, and lemon juice on low speed for 2 minutes, then on high for 3 minutes, until thick, glossy, and able to hold a soft peak. Divide the icing into four bowls and tint three bowls with black, pink, and teal gel coloring.
8. Flood the Photo Window
Thin the white icing with water, 1 teaspoon at a time, until it ribbons off the spoon and settles in 5 seconds. Pipe a border around each cookie, flood the center with white icing, and let it dry for 4 hours, until firm and matte.
9. Pipe the Frame and Details
Pipe a black border around the white window to look like a photo frame, then use pink and teal icing to pipe a tiny landscape, heart, or initial inside. Let the finished cookies dry uncovered for 6 hours, until the icing feels hard and does not dent when pressed.
Delicious Variations
Chocolate Photo Cookies
Replace 1/4 cup of the flour with cocoa powder and use chocolate royal icing for a dark, moody picture frame effect.
Lemon Photo Cookies
Add 1 tablespoon of lemon zest and 1 teaspoon of lemon extract to the dough, then tint the icing in bright yellow and green.
Mini Bite-Size Photos
Cut the dough into 1 1/2-inch squares and pipe tiny single-color icons, which makes about 40 small cookies perfect for cookie trays.
How to Store Pinterest image
Refrigerator
Store decorated cookies in an airtight container in the refrigerator for up to 2 weeks, with parchment between layers so the icing does not stick.
Freezer
Freeze undecorated baked cookies in a zip-top bag for up to 3 months, or freeze the raw dough disk for up to 2 months and thaw it overnight in the refrigerator.
Reheating
These cookies are best eaten at room temperature, but if they soften, place them in a 300F (150C) oven for 3 to 4 minutes to crisp the edges without melting the icing.
Frequently Asked Questions
Q: Can I make Pinterest image cookies without royal icing?
Yes, you can use store-bought cookie icing or a simple powdered sugar glaze instead of royal icing. Just note that a glaze stays slightly soft and will not dry as hard or as shiny as royal icing, so the details may smudge more easily.
Q: How long do decorated sugar cookies last?
Decorated sugar cookies last about 2 weeks in an airtight container at room temperature or in the refrigerator. If the icing contains egg whites, refrigeration is the safest choice, and the cookies taste best within the first 7 days.
Q: Why did my sugar cookies spread in the oven?
The most common cause is warm dough or too much butter, so chill the dough for a full 30 minutes and measure the flour carefully. Also make sure your baking powder is fresh, because old leavener can cause uneven spreading.
Q: Can I use liquid food coloring for the icing?
Liquid food coloring works, but it thins the royal icing and can make the colors bleed. Gel or paste coloring is much better because it gives deep color with just a tiny amount and keeps the icing thick enough to pipe.
Q: Do I have to chill the cookie dough before baking?
Yes, chilling the dough for 30 minutes is important because it firms the butter and prevents the cookies from spreading too much. If you skip this step, the cookies will bake flatter and lose the clean round shape needed for the photo design.
Bake a batch of these Pinterest image cookies this weekend, decorate them with your favorite tiny scene, and share your photo-worthy results in the comments. Save this recipe to your cookie board so you can find it the next time you need a treat that looks as good as it tastes.
Pinterest image
Pinterest image cookies are a buttery vanilla sugar cookie you can actually eat, giving you a fun, photo-worthy treat for parties and gifts.
🧂 Ingredients
- 2 1/4 cups (280g) all-purpose flour
- 1 teaspoon baking powder
- 1 tablespoon cornstarch
- 1/2 teaspoon fine sea salt
- 3/4 cup (170g) unsalted butter, melted and slightly cooled
- 1 cup (200g) granulated sugar
- 2 large eggs, room temperature
- 2 teaspoons vanilla extract
- 3 cups (360g) powdered sugar, sifted
- 2 large egg whites, pasteurized
- 1/2 teaspoon lemon juice
- Gel food coloring in black, pink, and teal
📋 Instructions
- 1Whisk Dry Ingredients — Whisk the flour, baking powder, cornstarch, and salt in a medium bowl for 30 seconds, until no lumps remain. This distributes the leavener evenly so every cookie rises the same way.
- 2Mix Wet Ingredients — Stir the melted butter and granulated sugar in a large bowl until smooth, then whisk in the eggs and vanilla until glossy and pale, about 1 minute. The mixture should look like thin pancake batter.
- 3Form the Dough — Add the dry ingredients to the wet ingredients and stir with a spatula until a soft dough forms, then press it into a flat disk. Wrap the disk in plastic and chill it in the refrigerator for 30 minutes, until firm but still slightly tacky.
- 4Roll and Cut — Preheat the oven to 350F (175C) and line two baking sheets with parchment. Roll the chilled dough to 1/4 inch (6mm) thick between parchment sheets, cut 3-inch rounds, and place them 1 inch apart on the trays.
- 5Bake the Cookies — Bake one tray at a time for 10 to 12 minutes, until the edges are light golden brown and the centers look set but soft. The cookies should smell buttery and feel slightly firm at the edge when you touch them.
- 6Cool Completely — Slide the parchment onto a wire rack and let the cookies cool for 20 minutes, until they are completely room temperature. Warm cookies will melt the icing and make the colors bleed.
- 7Make Royal Icing — Beat the powdered sugar, egg whites, and lemon juice on low speed for 2 minutes, then on high for 3 minutes, until thick, glossy, and able to hold a soft peak. Divide the icing into four bowls and tint three bowls with black, pink, and teal gel coloring.
- 8Flood the Photo Window — Thin the white icing with water, 1 teaspoon at a time, until it ribbons off the spoon and settles in 5 seconds. Pipe a border around each cookie, flood the center with white icing, and let it dry for 4 hours, until firm and matte.
- 9Pipe the Frame and Details — Pipe a black border around the white window to look like a photo frame, then use pink and teal icing to pipe a tiny landscape, heart, or initial inside. Let the finished cookies dry uncovered for 6 hours, until the icing feels hard and does not dent when pressed.