

These vanilla bean scones are the kind of thing you make once and then keep making forever. They have that crackly, sugar-topped crust and a soft, barely-sweet crumb that tastes like pure vanilla rather than just sugar. The trick is real vanilla bean paste or a scraped pod, which gives you those gorgeous little black flecks and a flavor that extract alone can't match.
They are also genuinely easy. You cut cold butter into the dry ingredients, add cream, pat the dough into a circle, and bake. No stand mixer, no chilling overnight, no fussy laminating. From start to warm-from-the-oven is about 50 minutes, most of which is hands-off baking time.
Serve them with coffee in the morning, split and toasted with jam, or box them up for a brunch table. They look like they came from a fancy bakery and taste even better the next day, lightly rewarmed.
Why You'll Love This Recipe
About the Ingredients
2 1/2 cups (313g) all-purpose flour
Spoon the flour into the cup and level it off, or weigh it, since packed flour makes dry scones. For a slightly more tender crumb, swap 1/2 cup of the all-purpose for cake flour.
1/3 cup (67g) granulated sugar
This is a lightly sweet scone; if you like them sweeter, use up to 1/2 cup. Caster sugar dissolves faster if you have it.
1 tbsp baking powder
Check the date on your baking powder, since old powder is the number one reason scones come out flat. Use aluminum-free for the cleanest flavor.
1/2 tsp fine sea salt
Fine sea salt blends evenly into the dough. If using table salt, reduce to 1/4 teaspoon since it is much saltier by volume.
1/2 cup (113g) cold unsalted butter, cut into 1/2-inch cubes
The butter must be genuinely cold, straight from the fridge. European-style butter with higher fat gives an even richer, flakier result.
1 vanilla bean pod, split and scraped (or 1 tbsp vanilla bean paste)
Vanilla bean paste is the easiest way to get those signature flecks without the cost of whole pods. In a pinch, use 2 teaspoons pure vanilla extract, though the flavor will be less pronounced.
3/4 cup (180ml) cold heavy cream, plus 2 tbsp for brushing
Cold cream keeps the butter from softening before baking. Whole milk works in a pinch but produces a less rich scone.
1 large egg, cold
The egg adds structure and richness. For an egg-free version, use 1/4 cup extra cream instead.
2 tbsp turbinado or coarse sugar, for topping
Turbinado adds a crunchy, sparkly top that makes these look bakery-made. Demerara or even a light dusting of granulated sugar works fine.
Tips & Tricks
Keep Everything Cold
Warm butter melts into the flour and makes dense, flat scones, so chill your bowl and work quickly with your fingertips or a pastry cutter.
Don't Overwork the Dough
Stop mixing the moment the dough holds together; overmixing develops gluten and turns tender scones tough and bready.
Pat, Don't Roll
Patting the dough into a 1-inch-thick circle keeps the layers intact, while a rolling pin presses out the air and butter pockets.
Brush Before Baking
A thin coat of cream on top and sides helps the scones brown evenly and gives the coarse sugar something to stick to.
Pro Tips
Step-by-Step Instructions
1. Preheat and Prep
Preheat the oven to 400°F (200°C) and line a baking sheet with parchment paper. Keep the butter and cream in the fridge until the moment you need them.
2. Whisk the Dry Ingredients
In a large chilled bowl, whisk together the flour, granulated sugar, baking powder, and salt until evenly combined. If using a vanilla pod, rub the scraped seeds into the sugar with your fingertips first to distribute them evenly.
3. Cut in the Cold Butter
Add the cold butter cubes and toss to coat, then cut in with a pastry cutter or your fingertips until the mixture looks like coarse sand with some pea-sized butter pieces remaining. Those butter pockets are what create flaky layers.
4. Add the Wet Ingredients
Whisk the cold cream, egg, and vanilla bean paste (or extract) together in a small bowl, then pour over the flour mixture. Stir with a fork just until a shaggy dough forms and no dry flour remains, about 15 to 20 seconds.
5. Shape the Dough
Turn the dough onto a lightly floured surface and pat it gently into a 7-inch circle about 1 inch thick, folding it over itself once if it feels crumbly. Do not knead it; just press it together.
6. Cut the Wedges
Cut the circle into 8 wedges with a sharp knife, pressing straight down. Transfer the wedges to the prepared baking sheet, spacing them 2 inches apart.
7. Brush and Top
Brush the tops and sides with the remaining 2 tablespoons of cream and sprinkle generously with turbinado sugar. This is what gives the scones their golden, crackly crust.
8. Bake Until Golden
Bake at 400°F (200°C) for 18 to 22 minutes, until the tops are deep golden brown and the edges look crisp and set. A toothpick inserted in the center should come out with just a few moist crumbs, and an instant-read thermometer should read about 200°F (93°C).
9. Cool Slightly and Serve
Let the scones cool on the pan for 5 minutes, then transfer to a rack. Serve warm, ideally within an hour of baking, with soft butter, clotted cream, or jam.
Delicious Variations
Glazed Vanilla Bean Scones
Whisk 1 cup powdered sugar with 2 tablespoons cream and 1/2 teaspoon vanilla bean paste, then drizzle over cooled scones for a Starbucks-style finish.
Lemon Vanilla Scones
Add 1 tablespoon lemon zest to the sugar and rub it in with your fingers before mixing for a bright, citrusy twist.
White Chocolate Vanilla Scones
Fold 1/2 cup white chocolate chips into the dry mixture before adding the cream for a sweeter, dessert-like version.
How to Store Vanilla Bean Scones
Refrigerator
Store cooled scones in an airtight container at room temperature for up to 2 days, or refrigerate for up to 5 days; rewarm briefly to bring back the texture.
Freezer
Freeze baked scones in a zip-top bag for up to 2 months, or freeze unbaked shaped wedges on a tray and bake from frozen at 400°F (200°C) for 22 to 26 minutes.
Reheating
Rewarm in a 350°F (175°C) oven for 5 to 7 minutes, or split and toast in a skillet or toaster oven until the edges crisp.
Frequently Asked Questions
Q: Why are my scones flat and not rising?
Flat scones are almost always caused by expired baking powder or butter that was too warm. Check your baking powder's date and keep the butter and cream refrigerator-cold right up until mixing.
Q: Can I make vanilla bean scones without a vanilla bean pod?
Yes, vanilla bean paste is the best substitute because it contains real seeds and gives the same flecked look. Pure vanilla extract works too, but use 2 teaspoons and expect a slightly milder flavor.
Q: Can I make the dough ahead of time?
Yes, you can shape and cut the dough, then freeze the wedges on a tray and bake them straight from frozen. Add 4 to 6 minutes to the bake time and check that the centers reach about 200°F (93°C).
Q: What is the best way to cut scones so they rise properly?
Use a sharp knife and press straight down through the dough without twisting or sawing. Twisting seals the edges and prevents the scones from puffing up in the oven.
Q: How do I know when scones are fully baked?
The tops should be deep golden brown and the edges crisp, with an internal temperature near 200°F (93°C). A toothpick in the center should come out with just a few moist crumbs, not wet batter.
Bake a batch of these vanilla bean scones this weekend and let the smell fill your kitchen. If you make them, snap a photo and leave a comment below telling me how you topped yours.
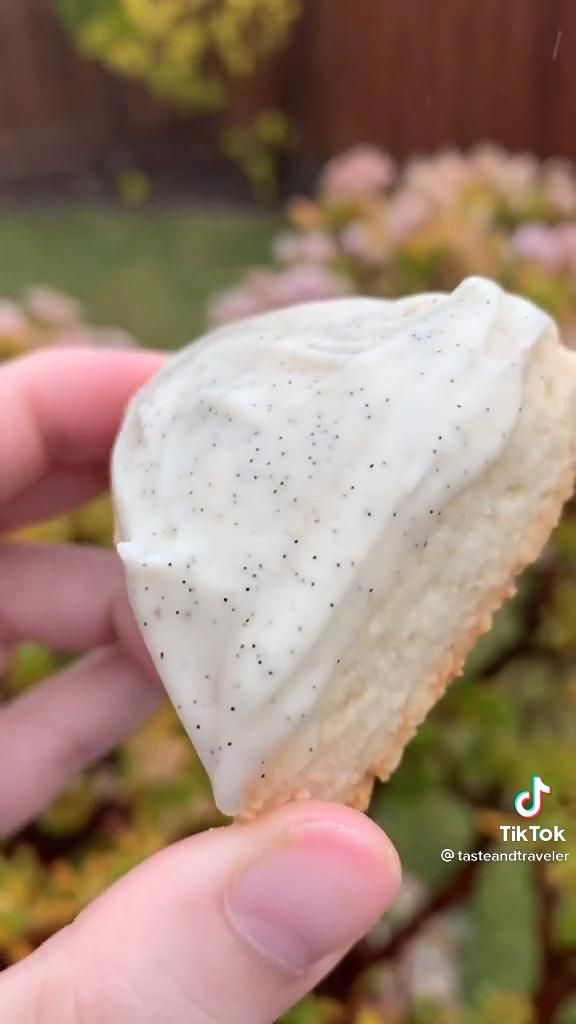
Vanilla Bean Scones
Vanilla bean scones are tender, buttery and speckled with real vanilla bean for a bakery-style treat that comes together in one bowl in under an hour.
🧂 Ingredients
- 2 1/2 cups (313g) all-purpose flour
- 1/3 cup (67g) granulated sugar
- 1 tbsp baking powder
- 1/2 tsp fine sea salt
- 1/2 cup (113g) cold unsalted butter, cut into 1/2-inch cubes
- 1 vanilla bean pod, split and scraped (or 1 tbsp vanilla bean paste)
- 3/4 cup (180ml) cold heavy cream, plus 2 tbsp for brushing
- 1 large egg, cold
- 2 tbsp turbinado or coarse sugar, for topping
📋 Instructions
- 1Preheat and Prep — Preheat the oven to 400°F (200°C) and line a baking sheet with parchment paper. Keep the butter and cream in the fridge until the moment you need them.
- 2Whisk the Dry Ingredients — In a large chilled bowl, whisk together the flour, granulated sugar, baking powder, and salt until evenly combined. If using a vanilla pod, rub the scraped seeds into the sugar with your fingertips first to distribute them evenly.
- 3Cut in the Cold Butter — Add the cold butter cubes and toss to coat, then cut in with a pastry cutter or your fingertips until the mixture looks like coarse sand with some pea-sized butter pieces remaining. Those butter pockets are what create flaky layers.
- 4Add the Wet Ingredients — Whisk the cold cream, egg, and vanilla bean paste (or extract) together in a small bowl, then pour over the flour mixture. Stir with a fork just until a shaggy dough forms and no dry flour remains, about 15 to 20 seconds.
- 5Shape the Dough — Turn the dough onto a lightly floured surface and pat it gently into a 7-inch circle about 1 inch thick, folding it over itself once if it feels crumbly. Do not knead it; just press it together.
- 6Cut the Wedges — Cut the circle into 8 wedges with a sharp knife, pressing straight down. Transfer the wedges to the prepared baking sheet, spacing them 2 inches apart.
- 7Brush and Top — Brush the tops and sides with the remaining 2 tablespoons of cream and sprinkle generously with turbinado sugar. This is what gives the scones their golden, crackly crust.
- 8Bake Until Golden — Bake at 400°F (200°C) for 18 to 22 minutes, until the tops are deep golden brown and the edges look crisp and set. A toothpick inserted in the center should come out with just a few moist crumbs, and an instant-read thermometer should read about 200°F (93°C).
- 9Cool Slightly and Serve — Let the scones cool on the pan for 5 minutes, then transfer to a rack. Serve warm, ideally within an hour of baking, with soft butter, clotted cream, or jam.