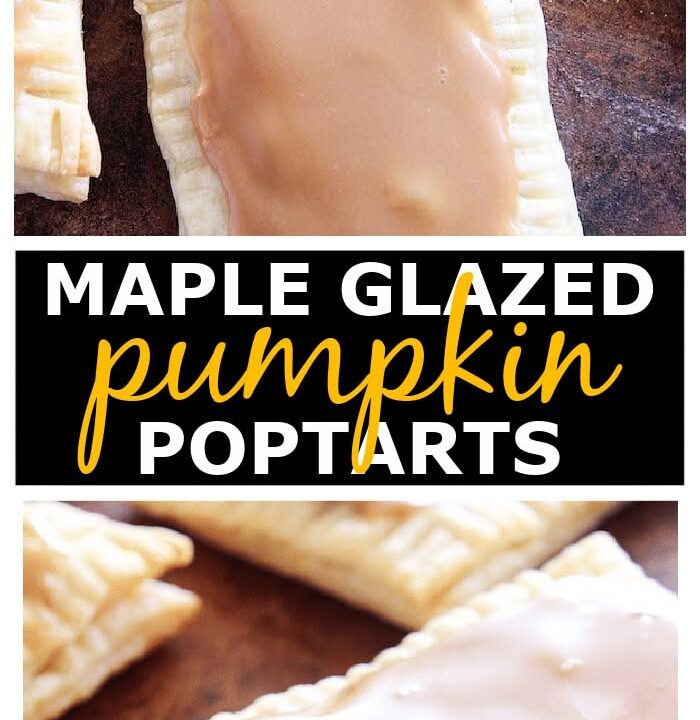
Maple-Glazed Pumpkin Poptarts earn a permanent spot in the fall rotation because they taste like a pumpkin pie met a buttery pastry and decided to stay for breakfast. The filling comes together in one bowl, and the dough rolls out without any fancy equipment.
I make these on a Sunday afternoon and they carry us through school mornings all week. The maple glaze is the part everyone remembers, so don't skip it.
If you have never made a homemade poptart before, this is the gentle place to start. The dough is forgiving, the filling is sturdy, and even a slightly lopsided rectangle bakes up golden and proud.
Why You'll Love This Recipe
About the Ingredients
2 1/2 cups (313g) all-purpose flour, plus extra for rolling
Spoon the flour into the cup and level it off, or the dough turns dry. Swap in 1 cup (125g) whole-wheat pastry flour for a nuttier crust.
1 cup (227g) cold unsalted butter, cut into cubes
Cold butter is what makes the layers flake. Frozen butter grated on a box grater works even better if your kitchen runs warm.
1/2 cup (120ml) cold whole milk
Cold buttermilk or half-and-half can stand in here. Keep it in the fridge until the moment you pour it.
3/4 cup (180g) canned pumpkin puree, not pumpkin pie filling
Check the label for 100 percent pumpkin; pie filling is already sweetened and spiced. Roasted sweet potato puree is a fine substitute in a pinch.
1/4 cup (50g) packed brown sugar
Dark brown sugar gives a deeper molasses note. Coconut sugar works but bakes a touch drier.
1 1/2 teaspoons pumpkin pie spice
Make your own with 1 teaspoon cinnamon, 1/4 teaspoon ginger, 1/4 teaspoon nutmeg, and a pinch of cloves. Freshly grated nutmeg makes a real difference.
1/2 teaspoon fine salt
Fine sea salt dissolves evenly into both dough and filling. Skip coarse kosher salt here since it won't blend smoothly.
1 cup (120g) powdered sugar
Sift it first so the glaze stays lump-free. For a less sweet finish, use 3/4 cup (90g) and add a splash more maple syrup.
3 tablespoons pure maple syrup
Use the real thing, not pancake syrup, for that unmistakable flavor. Honey thins the glaze similarly if you're out of maple.
1 tablespoon unsalted butter, melted, for the glaze
Melted butter gives the glaze a soft sheen. A tablespoon of cream cheese in its place makes it tangier and thicker.
Tips & Tricks
Keep Everything Cold
Warm butter melts into the flour instead of forming flakes, so chill your bowl and work quickly.
Seal the Edges Well
Press the tines of a fork firmly all around each rectangle so the filling can't bubble out in the oven.
Don't Overfill
A scant 2 tablespoons of pumpkin per pastry is plenty; more and the seams burst.
Glaze After Cooling
Brush the maple glaze on once the pastries are warm, not hot, so it sets instead of sliding off.
Pro Tips
Step-by-Step Instructions
1. Make the dough
Whisk the flour and salt in a large bowl, then cut in the cold butter with a pastry blender or your fingertips until the pieces are the size of peas. Pour in the cold milk and stir just until a shaggy dough forms.
2. Chill the dough
Shape the dough into two flat discs, wrap them, and refrigerate for 30 minutes so the butter firms up and the flour hydrates. This is the step that guarantees flaky layers.
3. Mix the filling
Stir the pumpkin puree, brown sugar, pumpkin pie spice, and a pinch of salt together in a small bowl until smooth. Taste it and add a little more spice if you like a bolder flavor.
4. Roll and cut
Heat the oven to 375°F (190°C) and line two baking sheets with parchment. Roll each disc on a floured surface to 1/8 inch (3mm) thick and cut into 3-by-4-inch rectangles, re-rolling scraps once.
5. Fill and seal
Spoon a scant 2 tablespoons of filling onto half the rectangles, leaving a 1/2-inch border. Top with a second rectangle, press the edges closed, and crimp with a fork. Prick the tops twice with a fork.
6. Bake until golden
Bake for 20 to 24 minutes, until the edges are golden brown and the filling at the center reads 200°F (93°C) on an instant-read thermometer. Rotate the pans halfway through for even color.
7. Whisk the glaze
While the pastries bake, whisk the powdered sugar, maple syrup, and melted butter until glossy and pourable. Add a teaspoon of milk if it looks too thick to brush.
8. Glaze and cool
Brush the warm pastries generously with maple glaze and let them set on a rack for 10 minutes. They firm up as they cool, which makes them easy to wrap and store.
Delicious Variations
Pecan Crunch
Sprinkle 1 tablespoon of chopped toasted pecans over the glaze before it sets for a little crunch.
Apple Butter Swap
Replace the pumpkin filling with apple butter and add a pinch of cinnamon to the glaze.
Brown Butter Glaze
Brown the butter for the glaze first, then whisk in the sugar and maple for a toasty, nutty finish.
How to Store Maple-Glazed Pumpkin Poptarts
Refrigerator
Store cooled pastries in an airtight container in the refrigerator for up to 5 days; the glaze stays freshest when layered with parchment.
Freezer
Freeze baked, unglazed pastries in a single layer, then stack in a freezer bag for up to 2 months. Glaze after reheating.
Reheating
Toast in a 350°F (175°C) oven for 6 to 8 minutes, or pop in a toaster on a low setting until the edges crisp again.
Frequently Asked Questions
Q: Can I use store-bought pie crust instead of making the dough?
Absolutely, two refrigerated pie crusts work as a shortcut and cut the prep time in half. Just roll them slightly thinner and seal the edges well.
Give these maple-glazed pumpkin poptarts a try this week and watch how fast the plate empties. Cook it your way, and tell me how it went.
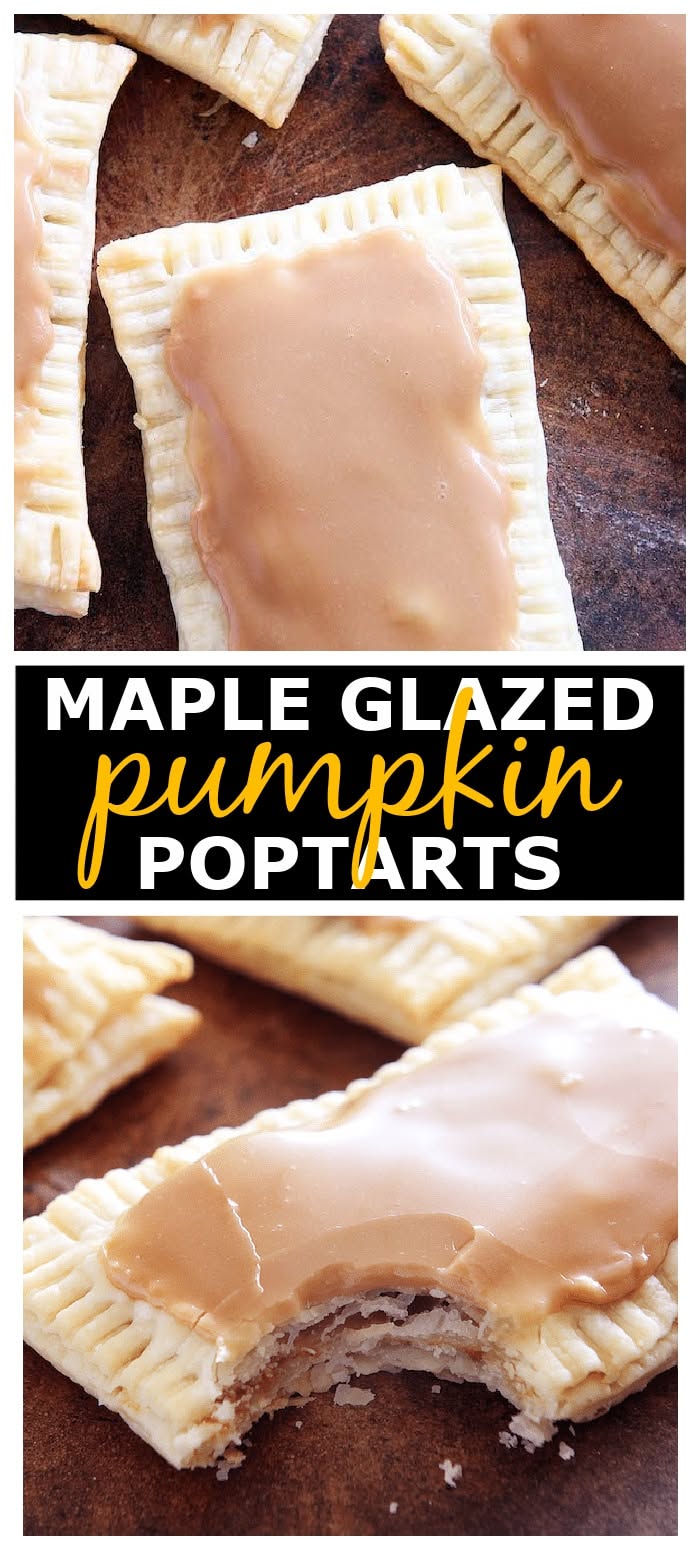
Maple-Glazed Pumpkin Poptarts
Maple-Glazed Pumpkin Poptarts are flaky homemade pastries filled with spiced pumpkin and brushed with sweet maple icing for an easy fall treat.
🧂 Ingredients
- 2 1/2 cups (313g) all-purpose flour, plus extra for rolling
- 1 cup (227g) cold unsalted butter, cut into cubes
- 1/2 cup (120ml) cold whole milk
- 3/4 cup (180g) canned pumpkin puree, not pumpkin pie filling
- 1/4 cup (50g) packed brown sugar
- 1 1/2 teaspoons pumpkin pie spice
- 1/2 teaspoon fine salt
- 1 cup (120g) powdered sugar
- 3 tablespoons pure maple syrup
- 1 tablespoon unsalted butter, melted, for the glaze
📋 Instructions
- 1Make the dough — Whisk the flour and salt in a large bowl, then cut in the cold butter with a pastry blender or your fingertips until the pieces are the size of peas. Pour in the cold milk and stir just until a shaggy dough forms.
- 2Chill the dough — Shape the dough into two flat discs, wrap them, and refrigerate for 30 minutes so the butter firms up and the flour hydrates. This is the step that guarantees flaky layers.
- 3Mix the filling — Stir the pumpkin puree, brown sugar, pumpkin pie spice, and a pinch of salt together in a small bowl until smooth. Taste it and add a little more spice if you like a bolder flavor.
- 4Roll and cut — Heat the oven to 375°F (190°C) and line two baking sheets with parchment. Roll each disc on a floured surface to 1/8 inch (3mm) thick and cut into 3-by-4-inch rectangles, re-rolling scraps once.
- 5Fill and seal — Spoon a scant 2 tablespoons of filling onto half the rectangles, leaving a 1/2-inch border. Top with a second rectangle, press the edges closed, and crimp with a fork. Prick the tops twice with a fork.
- 6Bake until golden — Bake for 20 to 24 minutes, until the edges are golden brown and the filling at the center reads 200°F (93°C) on an instant-read thermometer. Rotate the pans halfway through for even color.
- 7Whisk the glaze — While the pastries bake, whisk the powdered sugar, maple syrup, and melted butter until glossy and pourable. Add a teaspoon of milk if it looks too thick to brush.
- 8Glaze and cool — Brush the warm pastries generously with maple glaze and let them set on a rack for 10 minutes. They firm up as they cool, which makes them easy to wrap and store.

Mireille writes about weeknight cooking built around what is already in the pantry, with a focus on Haitian and Caribbean home dishes made simpler for busy kitchens. She favors short ingredient lists, honest substitutions, and recipes that forgive a missed step. Her angle is feeding a household well without a second trip to the store.