A Pinterest image is not normally something you eat. This recipe prints a logo or photo onto an icing sheet and presses it onto a vanilla cookie, so the image becomes a dessert. The base is a firm, low-spread dough that holds a rectangle or circle without warping, which matters because a photo needs a flat surface.
Weigh the dough, chill it, and cut shapes at 4 mm (about 1/8 inch) thick. Thinner cookies curl under the icing sheet; thicker ones stay soft and the print wrinkles. The icing sheet goes on after baking, when the cookie is fully cool, and it bonds to a thin layer of corn syrup.
The result is a clean, sharp image with a cookie underneath. Work in a dry room and keep the sheets sealed until the last minute; humidity is the only real enemy here.
Why You'll Love This Recipe
About the Ingredients
250 g (2 cups) all-purpose flour
Weigh flour rather than scooping; a cup scooped from the bag can weigh 30 g more. Substitute cake flour for a softer bite, but add 10 g extra.
100 g (1/2 cup) granulated sugar
Fine sugar dissolves faster into the butter. Caster sugar works directly; do not swap in brown sugar, which darkens the pale base.
170 g (3/4 cup) unsalted butter, softened
Pull butter from the fridge 45 minutes ahead; it should dent under a finger. Salted butter works if you drop the added salt.
1 large egg (50 g), room temperature
Cold egg seizes the butter mixture. If you forget, sit the egg in warm water for 10 minutes.
5 g (1 tsp) vanilla extract
Use real extract, not imitation, because the cookie is plain and the vanilla carries it. Vanilla bean paste adds visible specks.
3 g (1/2 tsp) fine salt
Fine sea salt dissolves evenly. Kosher salt is coarser, so use 4 g if that is what you have.
1 sheet printable icing paper (A4 or letter), 200 g pack
Buy food-grade icing sheets, not rice paper, which cracks. Check the expiry date; old sheets peel at the corners.
30 g (2 tbsp) light corn syrup, for adhering
Corn syrup is the bond; honey pulls moisture and softens the print. Glucose syrup is a direct substitute.
Tips & Tricks
Weigh the flour
Scooping from the bag adds up to 30 g per cup, and heavy flour makes a dry, cracking base.
Chill before cutting
Warm dough spreads in the oven and the rectangle edges round off. Twenty minutes in the fridge fixes it.
Apply the sheet on a cool cookie
A warm cookie steams under the icing paper and the ink blurs within seconds.
Pro Tips
Step-by-Step Instructions
1. Cream butter and sugar
Beat 170 g butter with 100 g sugar at medium speed for 3 minutes, until pale and doubled in volume. [Air pockets give the cookie a short, even crumb.] Stop when the mixture looks like soft cream, not grains.
2. Add egg and vanilla
Beat in the egg and 5 g vanilla for 30 seconds, scraping the bowl once. [Overbeating after the egg adds water and can split the emulsion.] The mix is ready when it is glossy and uniform.
3. Mix the dry
Whisk 250 g flour, 3 g salt, and any dry flavouring in a separate bowl. [Distributing salt now prevents bitter pockets in the finished cookie.]
4. Form the dough
Fold the dry mix into the butter mix on low speed until no flour streaks remain, about 20 seconds. [Stopping early keeps gluten low and the cookie tender.] The dough should pull clean from the bowl sides.
5. Chill the dough
Flatten the dough to 2 cm, wrap it, and refrigerate for 30 minutes. [Cold fat holds shape and stops edge spread.] It is ready when firm but still dents under a thumb.
6. Roll and cut
Roll to 4 mm between two sheets of parchment and cut rectangles or circles. [Parchment stops sticking without extra flour.] Re-roll scraps once only.
7. Bake at 175°C
Bake at 350°F (175°C) for 11 to 13 minutes on the middle rack. [Low heat keeps the pale colour needed under a photo.] Done when the edges are light golden and the centre looks matte.
8. Cool completely
Slide the cookies onto a rack and cool for 25 minutes. [Any warmth traps steam under the icing sheet.] They are ready when the underside feels room temperature.
9. Apply the icing sheet
Brush 1 to 2 g corn syrup on each cookie and press a cut icing image on top, smoothing from the centre out. [Working outward pushes air bubbles to the edge.] The print is set when the corners lie flat with no lift.
Delicious Variations
Chocolate Base
Swap 30 g of the flour for cocoa and add 10 g sugar; bake 1 minute longer.
Lemon Print Cookies
Add 3 g lemon zest to the sugar and rub it in before creaming.
Mini Logo Bites
Cut 4 cm squares and bake 8 to 9 minutes; print smaller images to match.
How to Store Pinterest Image
Refrigerator
Store baked undecorated cookies in an airtight tin at room temperature for 10 days; refrigerate only after the icing sheet is applied, up to 5 days.
Freezer
Freeze undecorated baked cookies in a sealed bag for 2 months; thaw 2 hours at room temperature before printing.
Reheating
Do not reheat printed cookies; warm icing sheets wrinkle. Refresh plain cookies at 150°C (300°F) for 4 minutes.
Frequently Asked Questions
Q: Can I print any image on an edible icing sheet?
Yes, any high-resolution image works if you print it with edible ink on a food-grade icing sheet. Keep text large and contrast high, because fine one-pixel lines blur in edible ink.
Q: How do you stick a photo to a cookie?
Light corn syrup is the standard adhesive, brushed thinly on a fully cooled cookie. Too much syrup shows as a wet patch through the sheet, so use 1 to 2 g per cookie.
Q: How long do photo cookies last?
Printed cookies keep 5 days at room temperature in a sealed container. After that the icing sheet softens and the image starts to fade.
Q: Why did my icing sheet curl at the edges?
Curling means the cookie was still warm or the room was humid. Cool cookies fully and work in dry air, pressing from the centre outward.
Q: Can I use rice paper instead of icing sheets?
Rice paper cracks and does not hold printed detail, so use icing sheets for photos. Rice paper suits simple stamped shapes only.
Bake a batch, print one test image, and check the bond before you commit the rest. Weigh, watch, repeat.
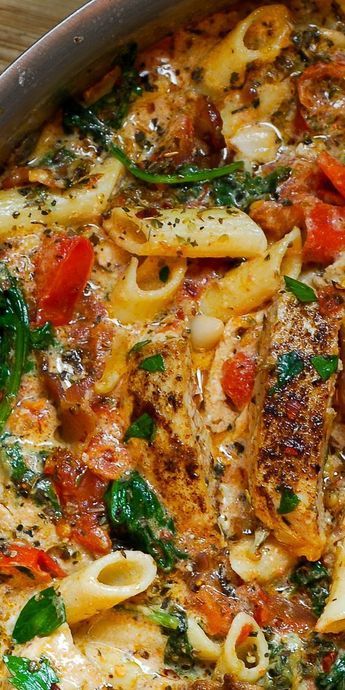
Pinterest Image
Pinterest Image cookies turn a logo into an edible photo treat with printable icing sheets, a crisp vanilla base, and a 30-minute bake.
🧂 Ingredients
- 250 g (2 cups) all-purpose flour
- 100 g (1/2 cup) granulated sugar
- 170 g (3/4 cup) unsalted butter, softened
- 1 large egg (50 g), room temperature
- 5 g (1 tsp) vanilla extract
- 3 g (1/2 tsp) fine salt
- 1 sheet printable icing paper (A4 or letter), 200 g pack
- 30 g (2 tbsp) light corn syrup, for adhering
📋 Instructions
- 1Cream butter and sugar — Beat 170 g butter with 100 g sugar at medium speed for 3 minutes, until pale and doubled in volume. [Air pockets give the cookie a short, even crumb.] Stop when the mixture looks like soft cream, not grains.
- 2Add egg and vanilla — Beat in the egg and 5 g vanilla for 30 seconds, scraping the bowl once. [Overbeating after the egg adds water and can split the emulsion.] The mix is ready when it is glossy and uniform.
- 3Mix the dry — Whisk 250 g flour, 3 g salt, and any dry flavouring in a separate bowl. [Distributing salt now prevents bitter pockets in the finished cookie.]
- 4Form the dough — Fold the dry mix into the butter mix on low speed until no flour streaks remain, about 20 seconds. [Stopping early keeps gluten low and the cookie tender.] The dough should pull clean from the bowl sides.
- 5Chill the dough — Flatten the dough to 2 cm, wrap it, and refrigerate for 30 minutes. [Cold fat holds shape and stops edge spread.] It is ready when firm but still dents under a thumb.
- 6Roll and cut — Roll to 4 mm between two sheets of parchment and cut rectangles or circles. [Parchment stops sticking without extra flour.] Re-roll scraps once only.
- 7Bake at 175°C — Bake at 350°F (175°C) for 11 to 13 minutes on the middle rack. [Low heat keeps the pale colour needed under a photo.] Done when the edges are light golden and the centre looks matte.
- 8Cool completely — Slide the cookies onto a rack and cool for 25 minutes. [Any warmth traps steam under the icing sheet.] They are ready when the underside feels room temperature.
- 9Apply the icing sheet — Brush 1 to 2 g corn syrup on each cookie and press a cut icing image on top, smoothing from the centre out. [Working outward pushes air bubbles to the edge.] The print is set when the corners lie flat with no lift.

Tomasz writes precise, method-first recipes for breads, ferments, and slow braises, drawing on Polish and Central European home cooking. He cares about weights, temperatures, and timing, and explains the reason behind each step so cooks can repeat results. His angle is turning fussy techniques into clear, checkable instructions.